4iiii iOS App – User Guide
SECTION1.0
INTRODUCTION
The 4iiii app is a valuable tool to get the most out of the features of your 4iiii products. Through the app, you can connect to your 4iiii devices to perform functions such as pairing, calibrating, naming or updating your powermeter and name, set up pass-through and download saved workout data from your Viiiiva. The 4iiii app will also allow you to unlock and purchase new features to make the most out of your device!
SECTION 2.0
GETTING STARTED
- On the Apple App Store, search for 4iiii and download the app.
- Once downloaded, open the app and create a new account by clicking Sign Up or use your existing 4iiii account.
Tiiiip: If you previously had a 4iiii account, you will need to create a new one. Don’t worry though, all of your saved .fit files will still be available!
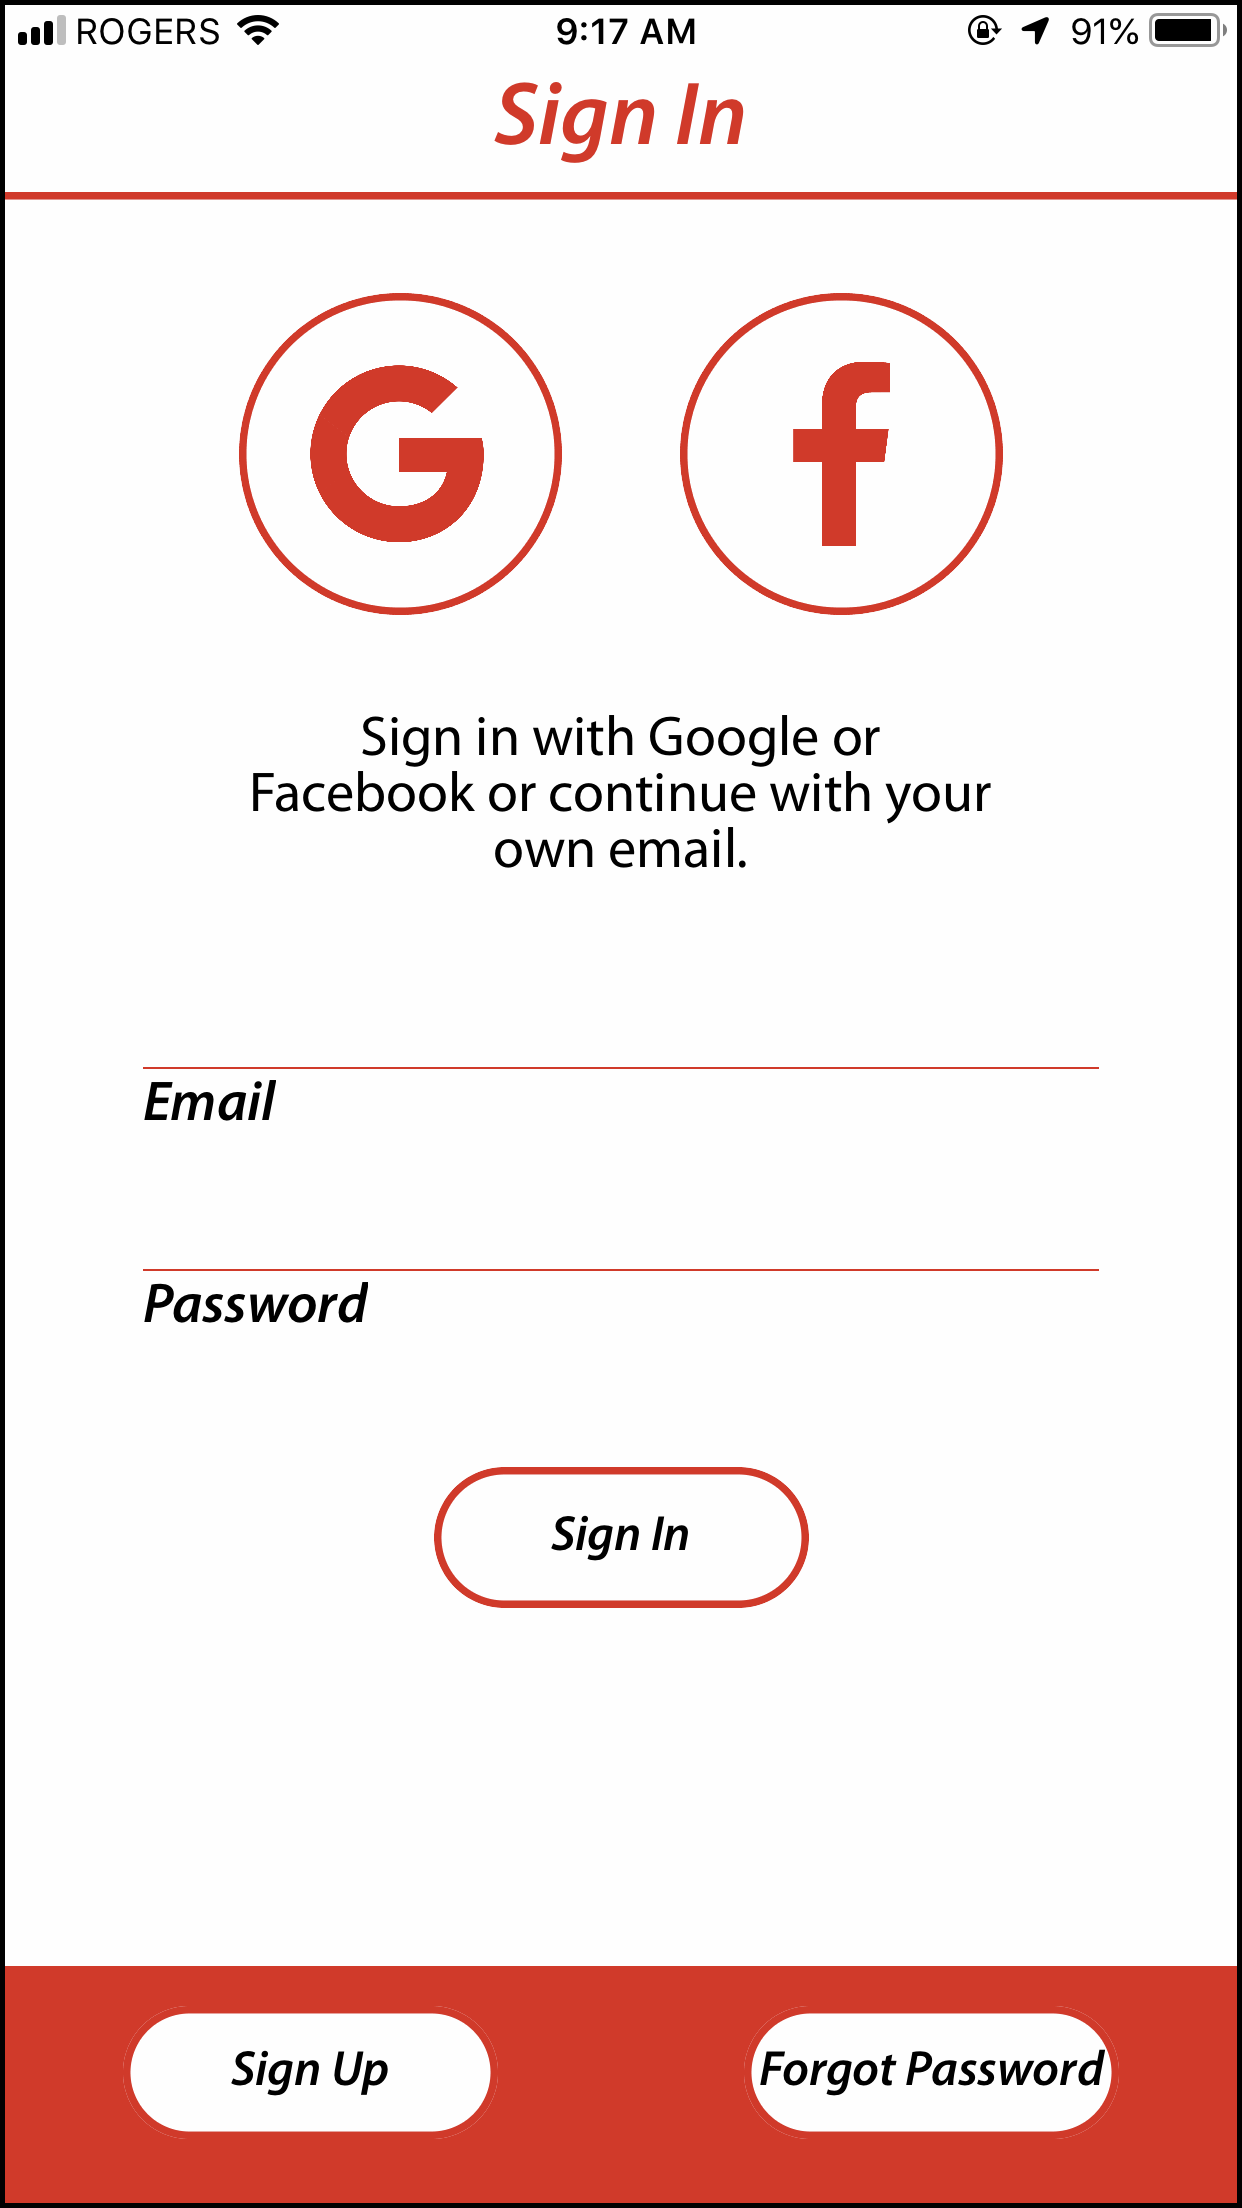
- Once you have an account, go to the More page and click on Edit Profile.
- Input your name, birthday, gender and weight to get the most out of the available features.
- You’re now set up and ready to use the app!
SECTION 3.0
POWERMETER FUNCTIONS
The 4iiii app will allow you to access functions on your 4iiii Powermeters. This is a useful tool to help initially setup and troubleshoot your device.
3.1
Connecting to a PRECISION or Podiiiium Powermeter
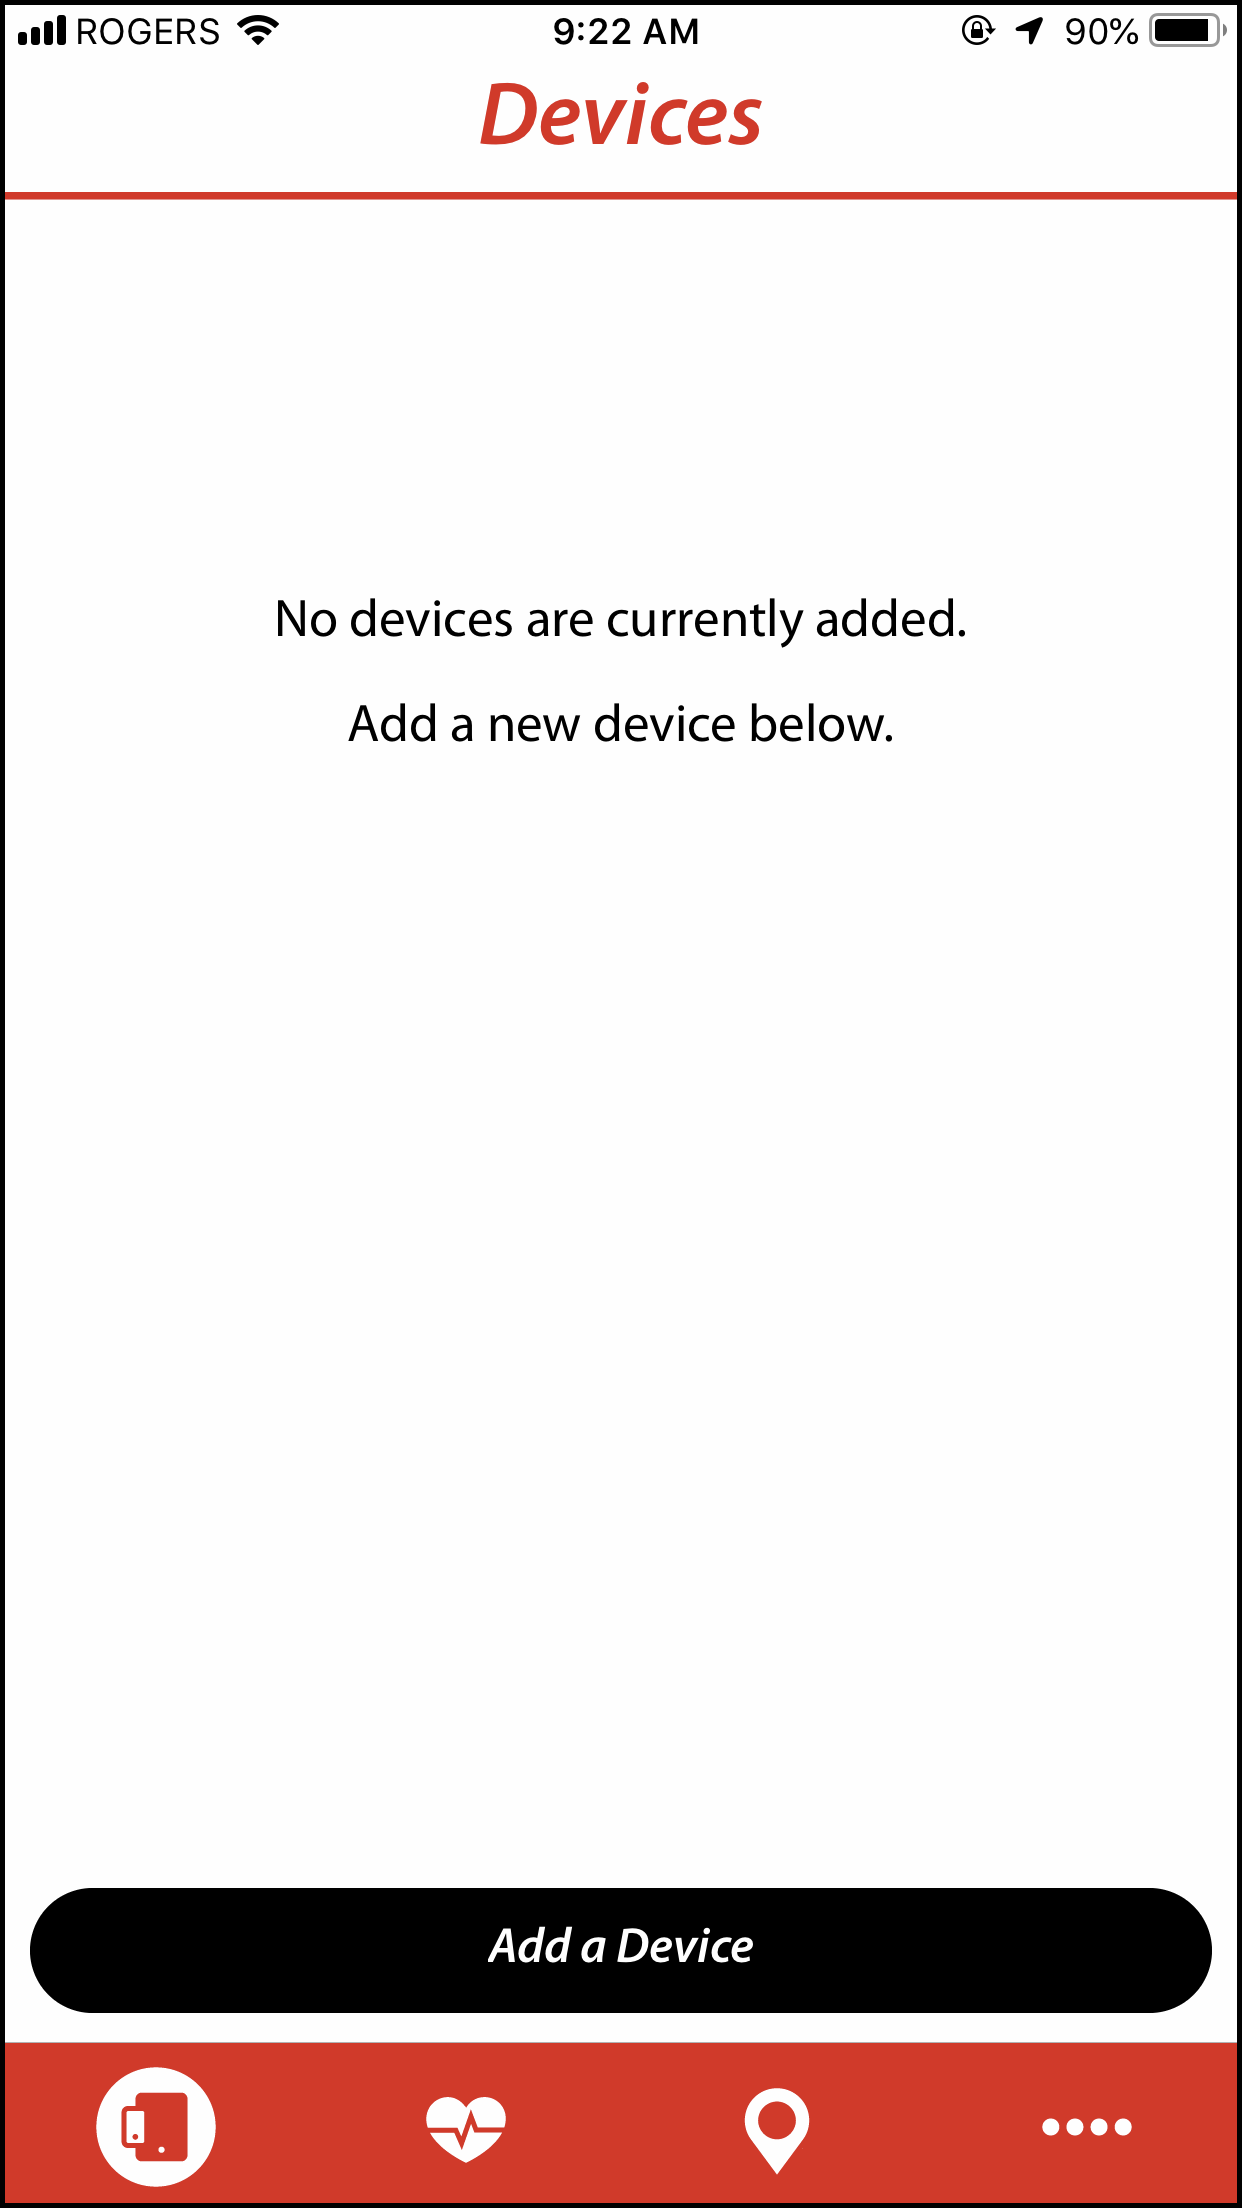
- Spin your PRECISION or Podiiiium Powermeter 3-4 times to wake it up.
- Click on the Devices tab on the bottom of the app screen. Then click Add a Device.
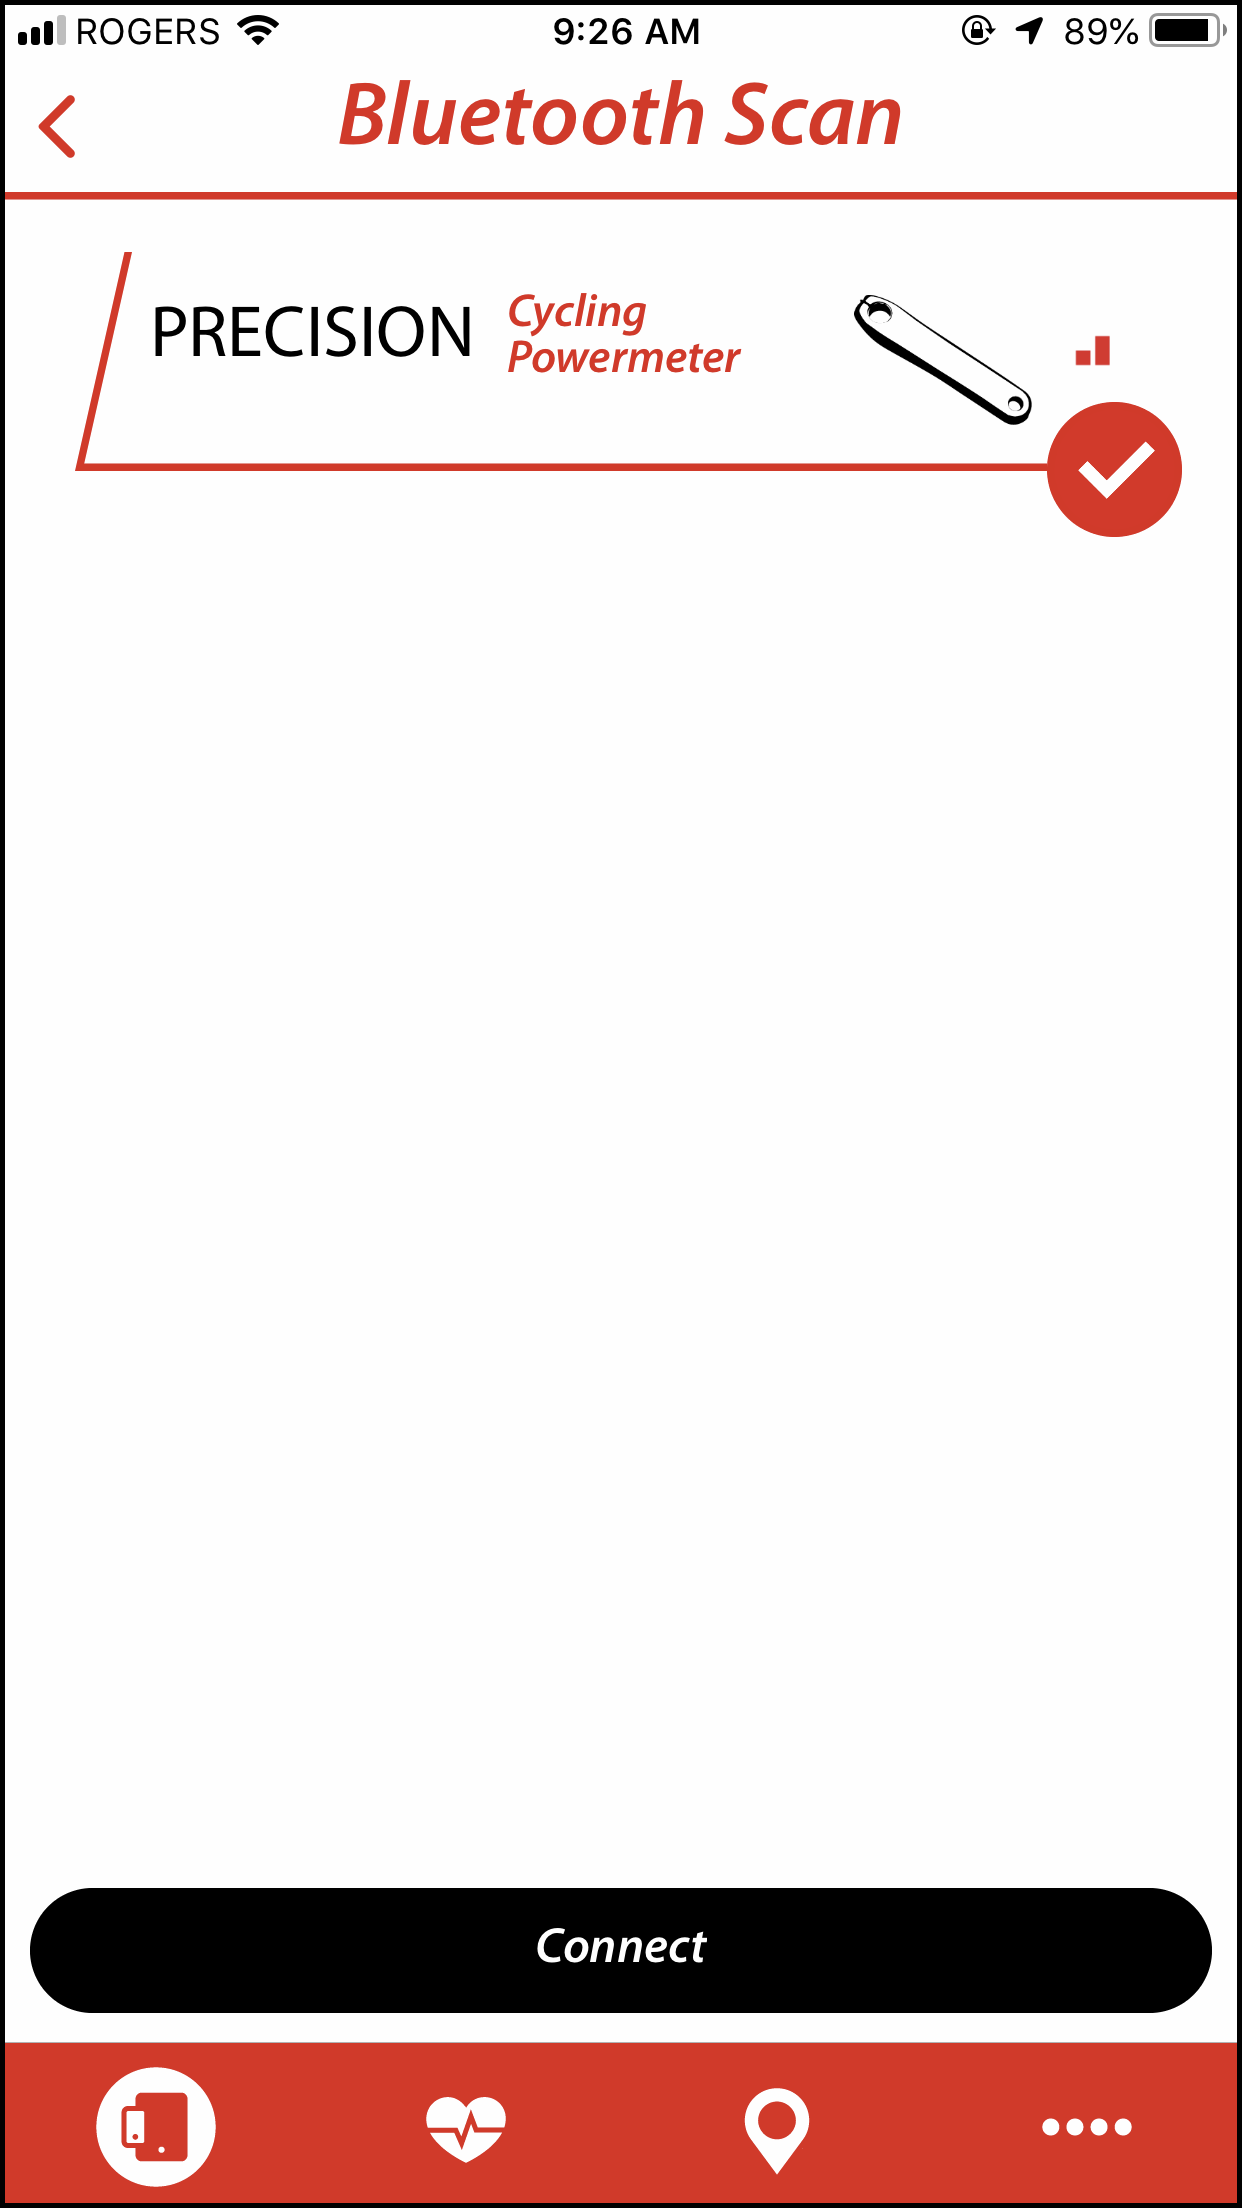
- Select your powermeter from the drop-down list and click Connect.
Tiiiip: If it is the first time you have connected your device, you can identify it using its ANT+ ID. This number is etched onto the side of the powermeter pod on the crank.
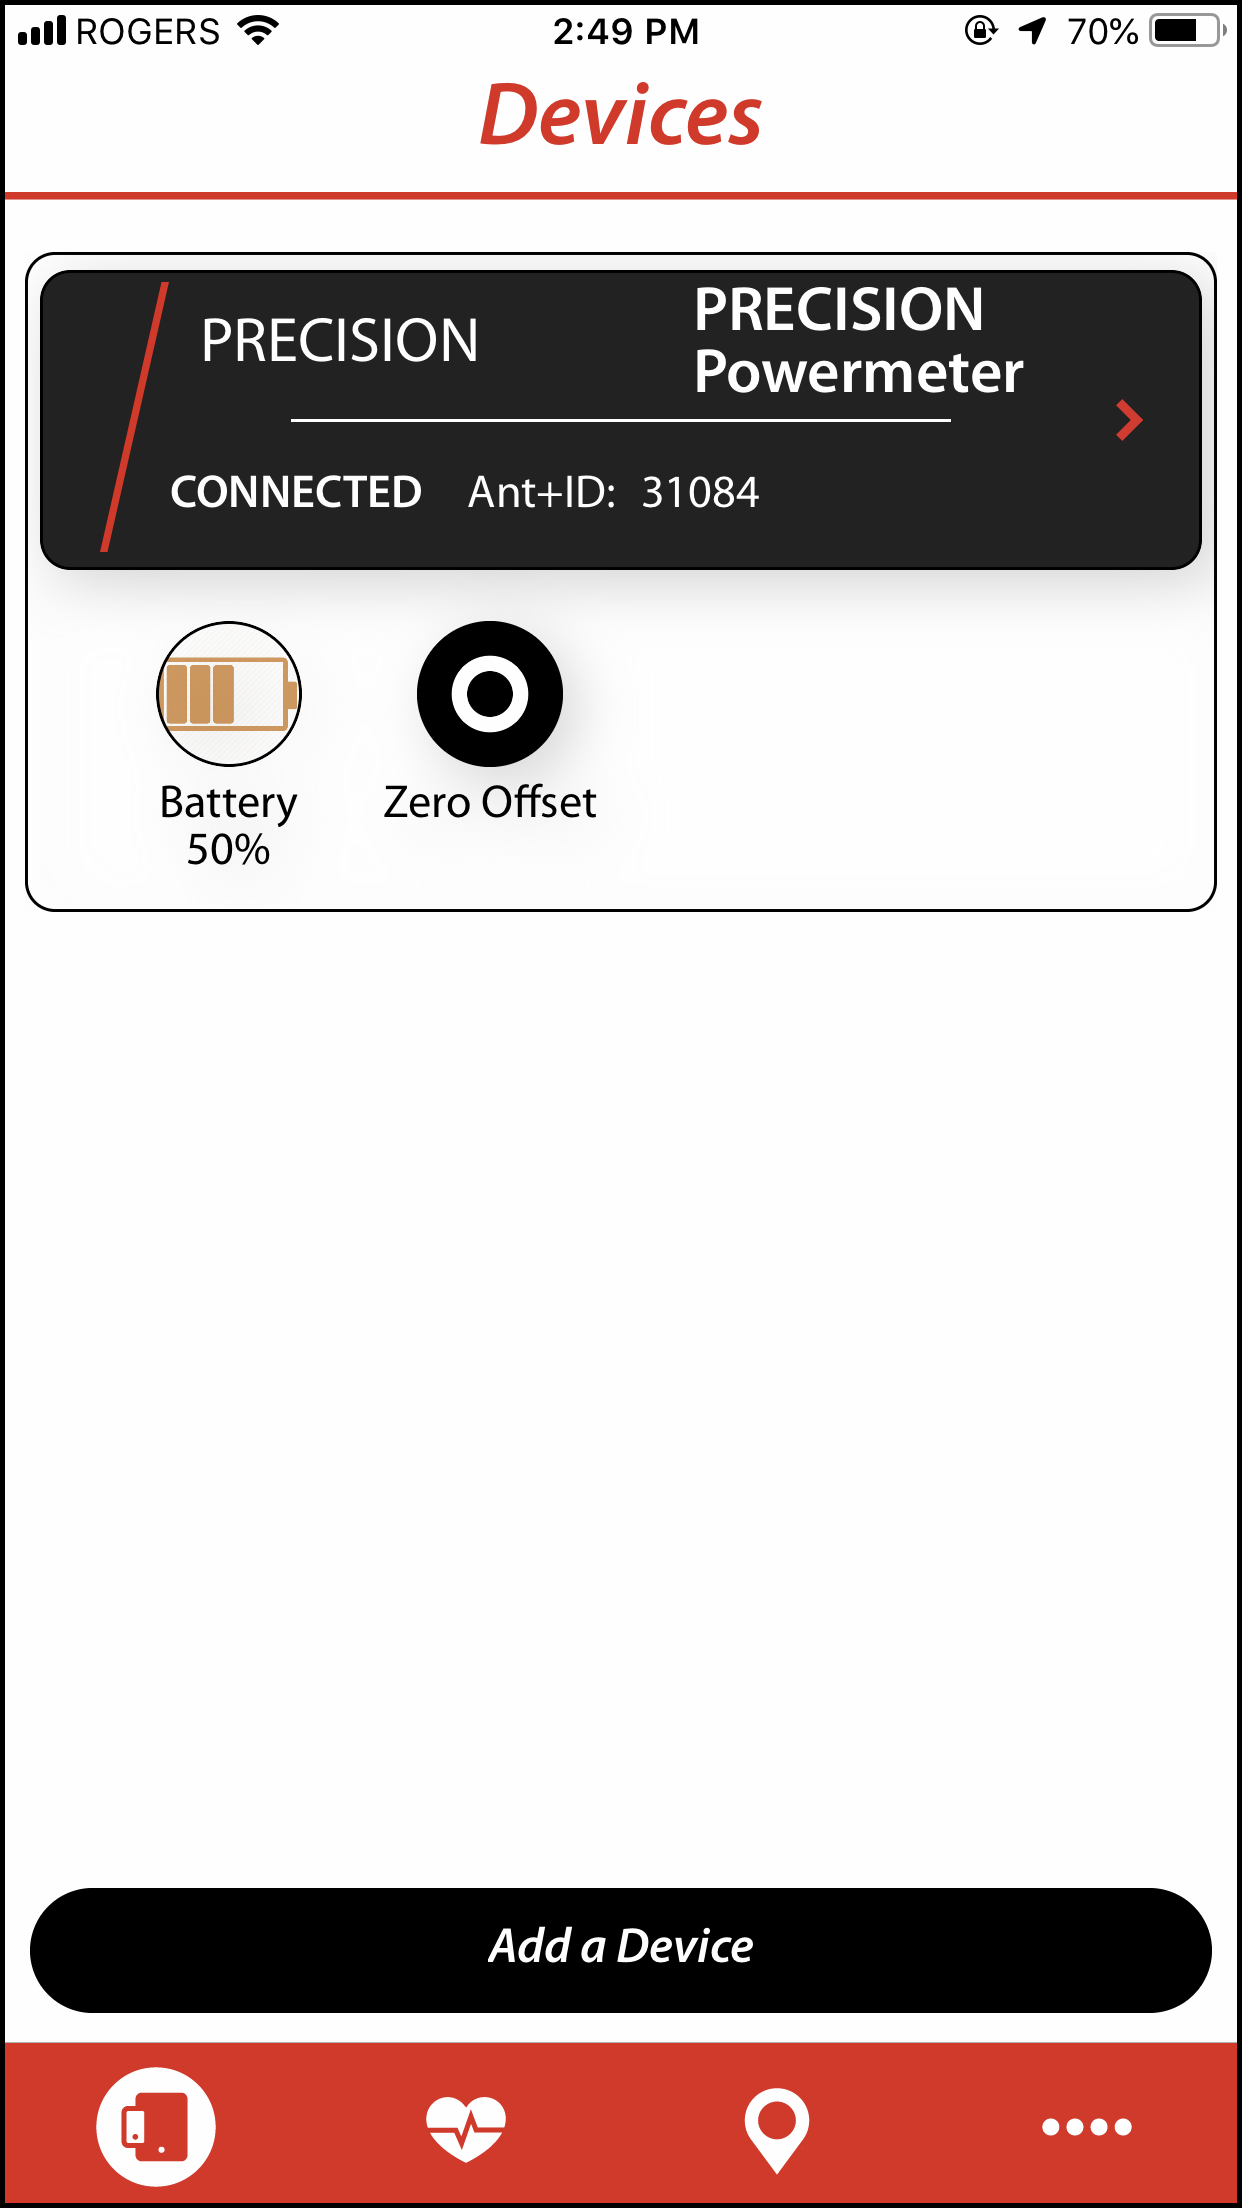
- Your PRECISION or Podiiiium Powermeter is now connected and ready to use.
3.2
Pairing a PRECISION PRO or Podiiiium Pro Powermeter

- Spin your PRECISION PRO or Podiiiium Pro Powermeter 3-4 times to wake it up.
- Click on the Devices tab on the bottom of the app screen. Then click Add a Device.
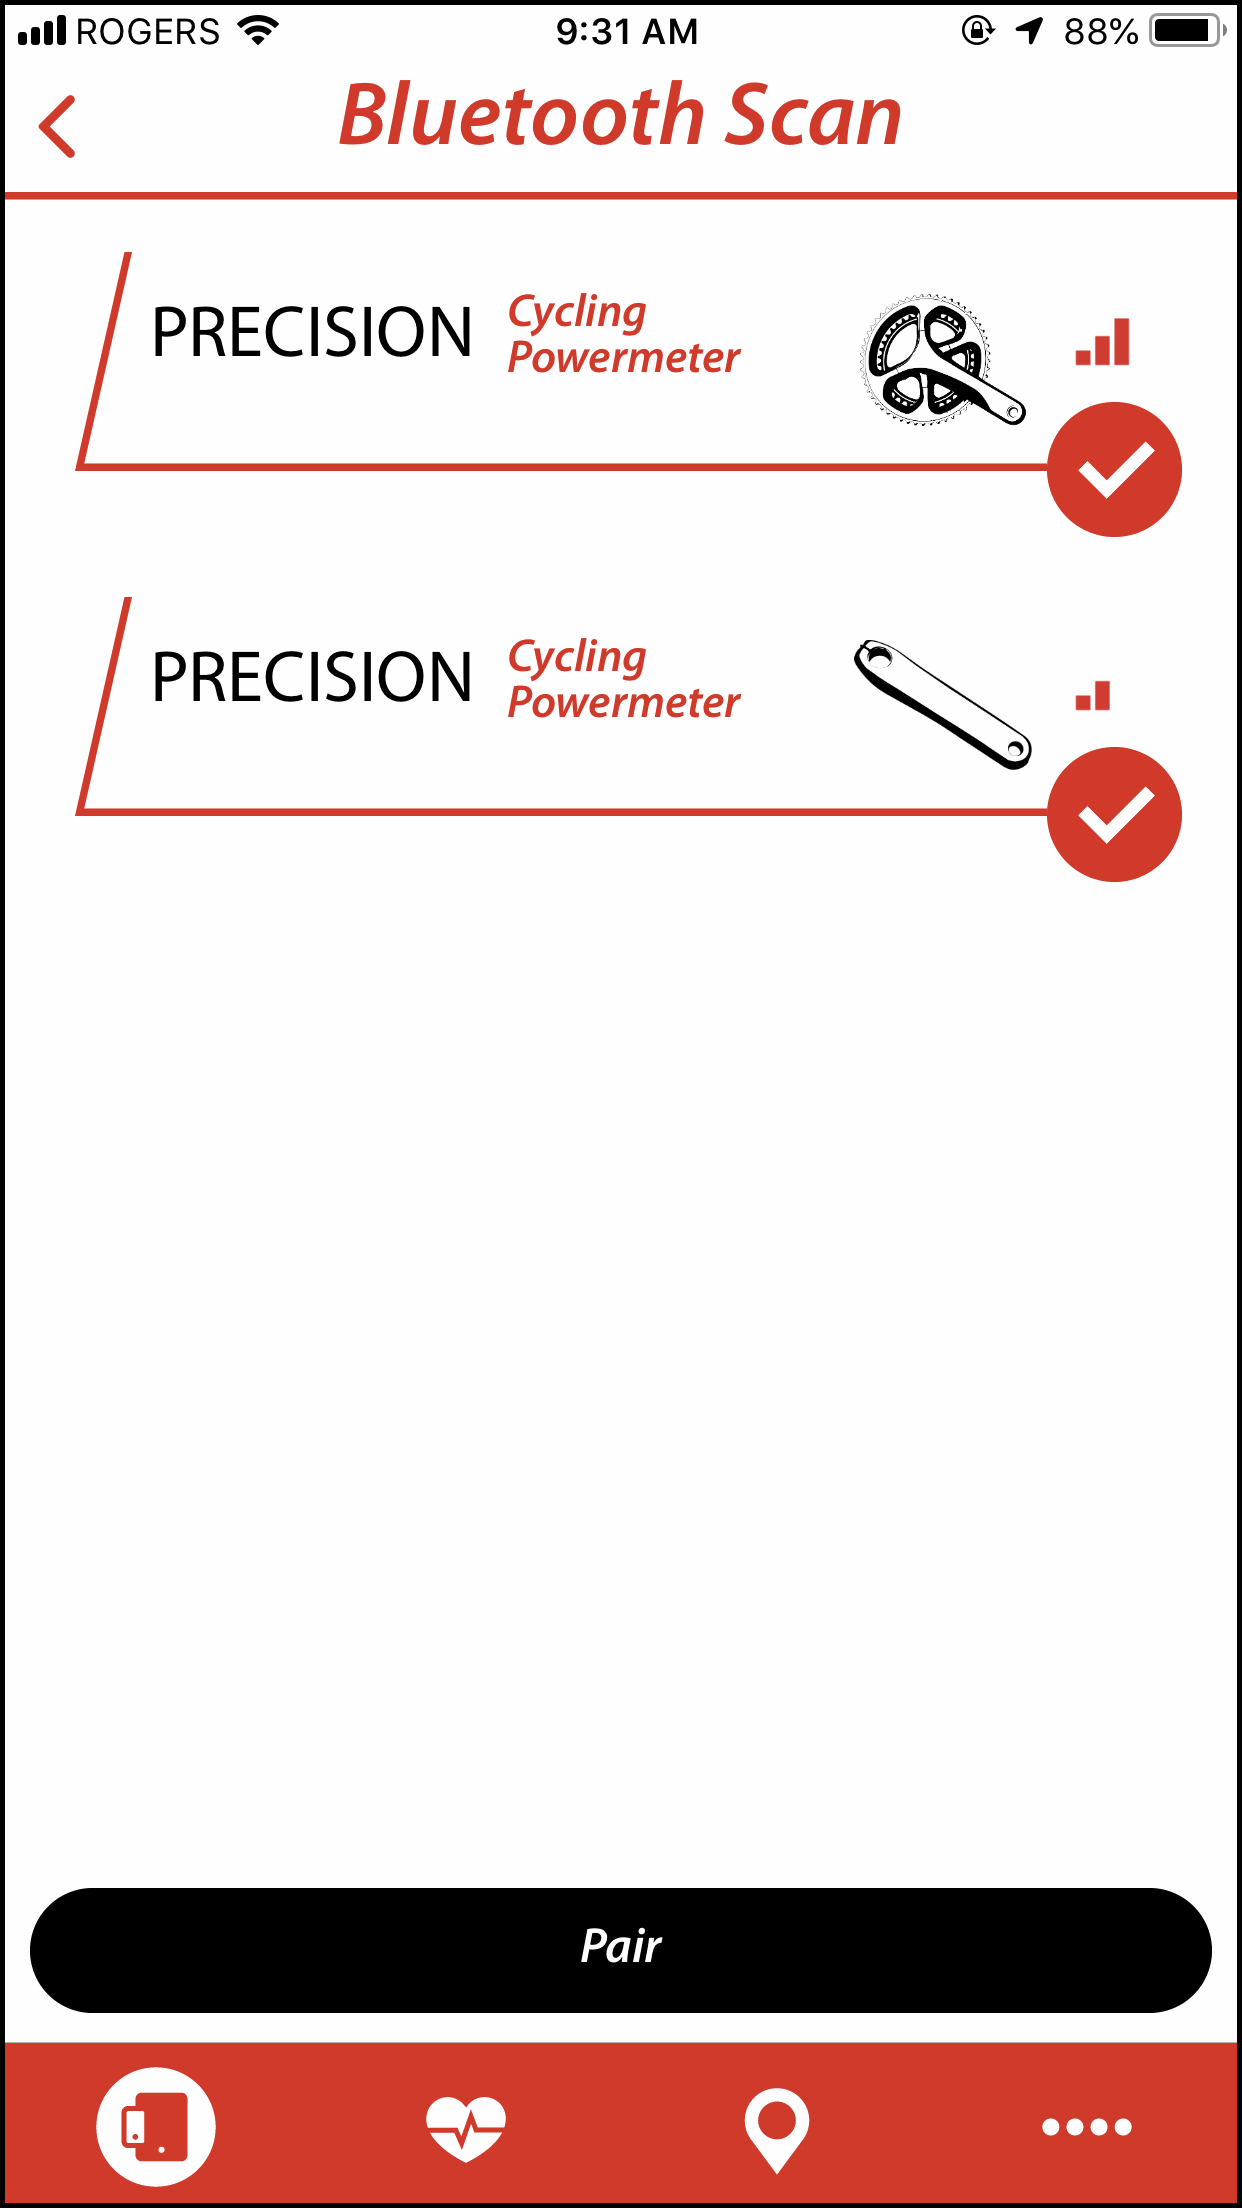
- Select both the Drive Side and Non-Drive Side powermeters from the drop-down list and click Pair. There will be a Drive Side and Non-Drive Side crank arm graphic beside each name to differentiate each side of the powermeter.
Tiiiip: If it is the first time you have connected your device, you can identify it using its ANT+ ID. This number is etched onto the side of the powermeter pod on the crank.
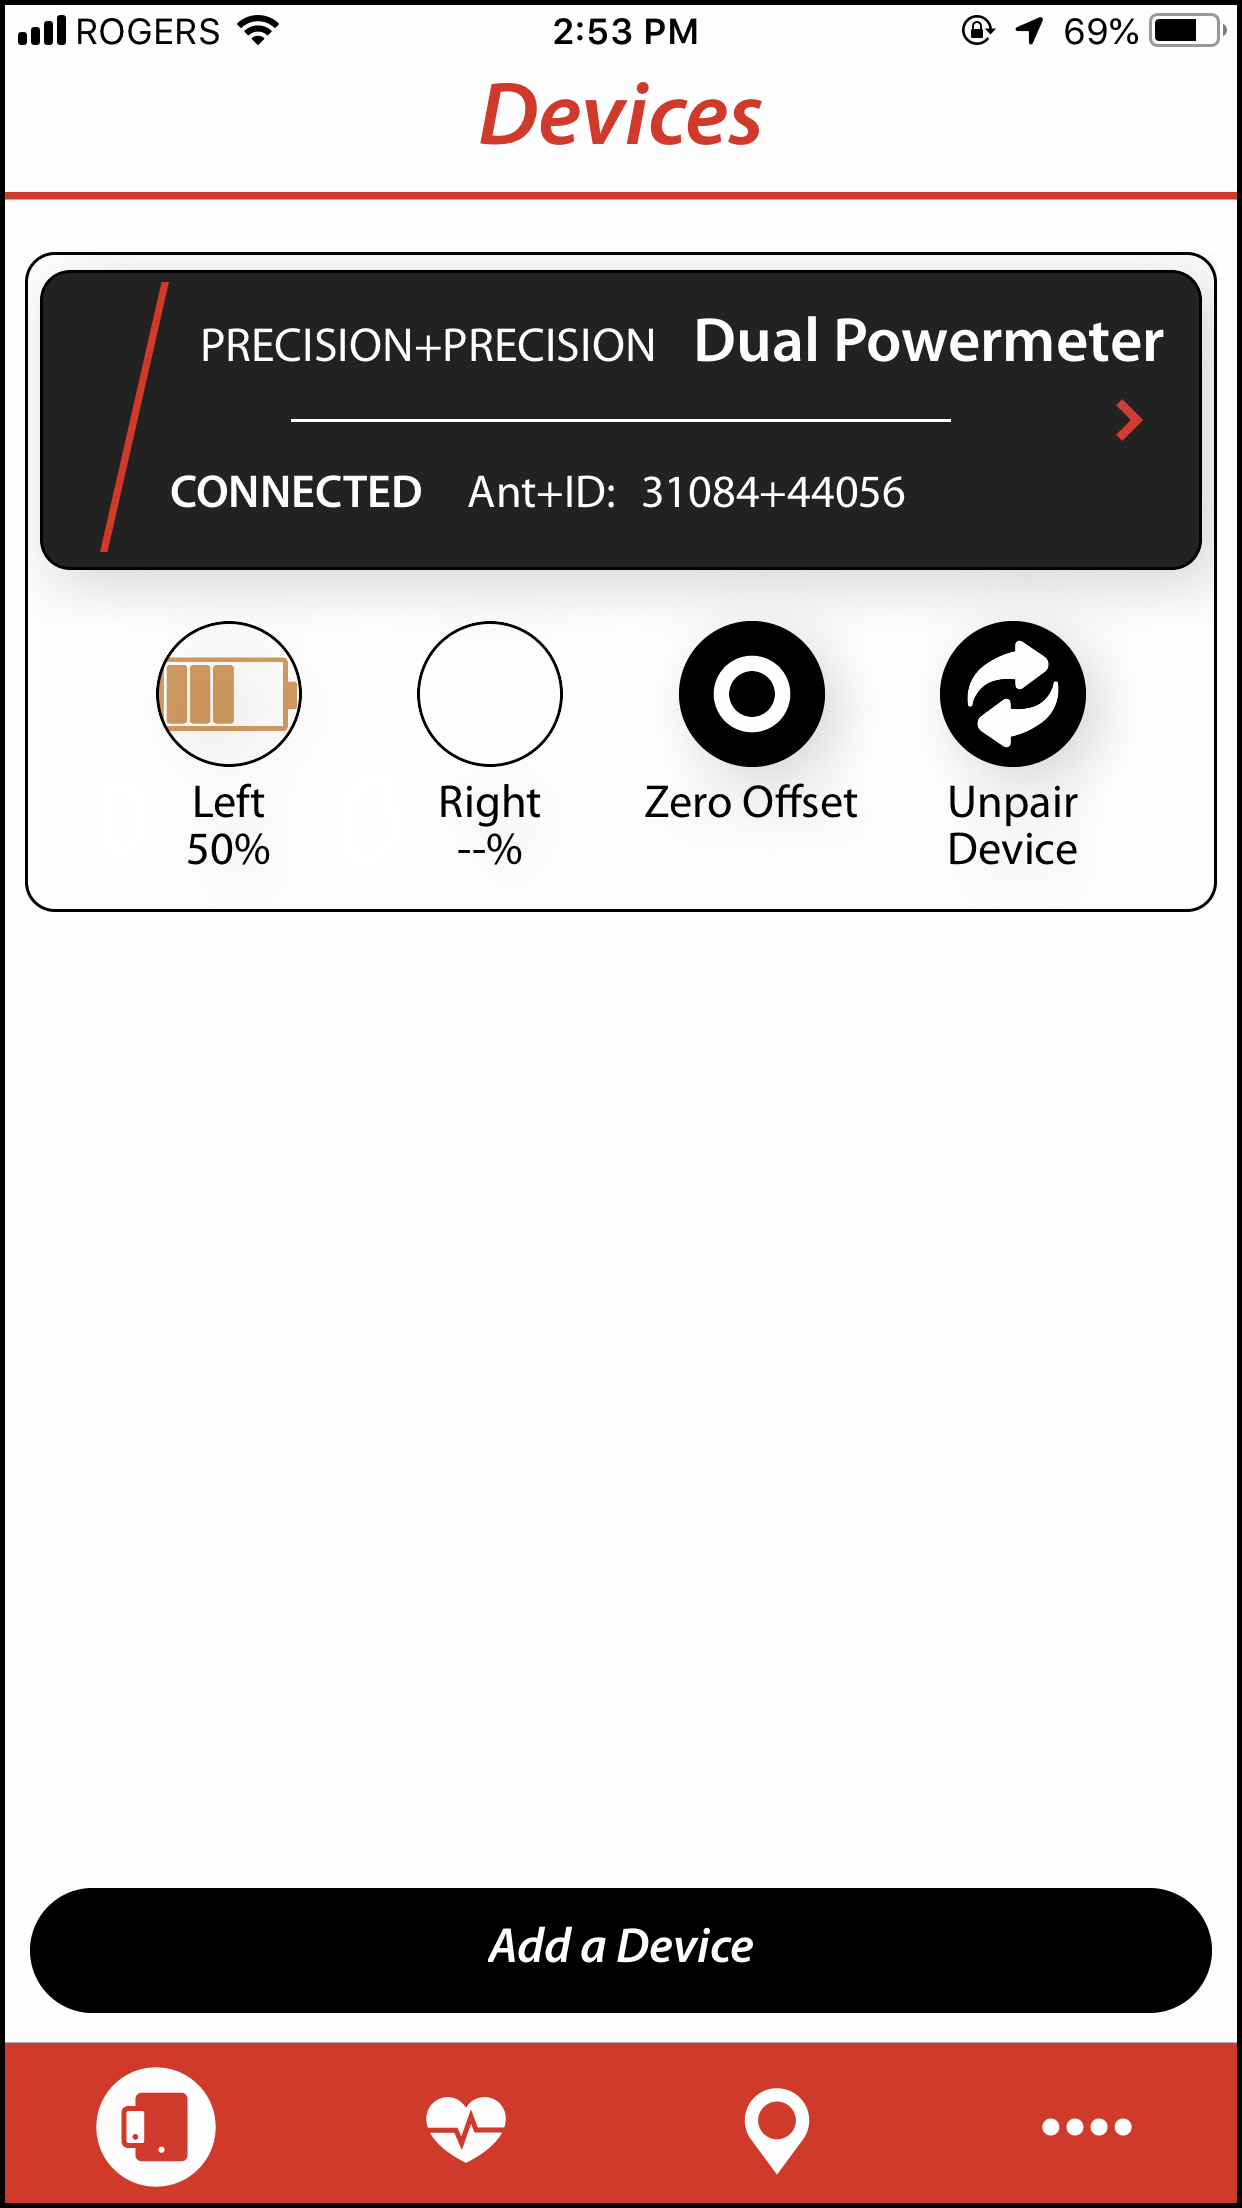
- Your PRECISION PRO or Podiiiium Pro Powermeter will now be paired and connected and ready to use.
3.3
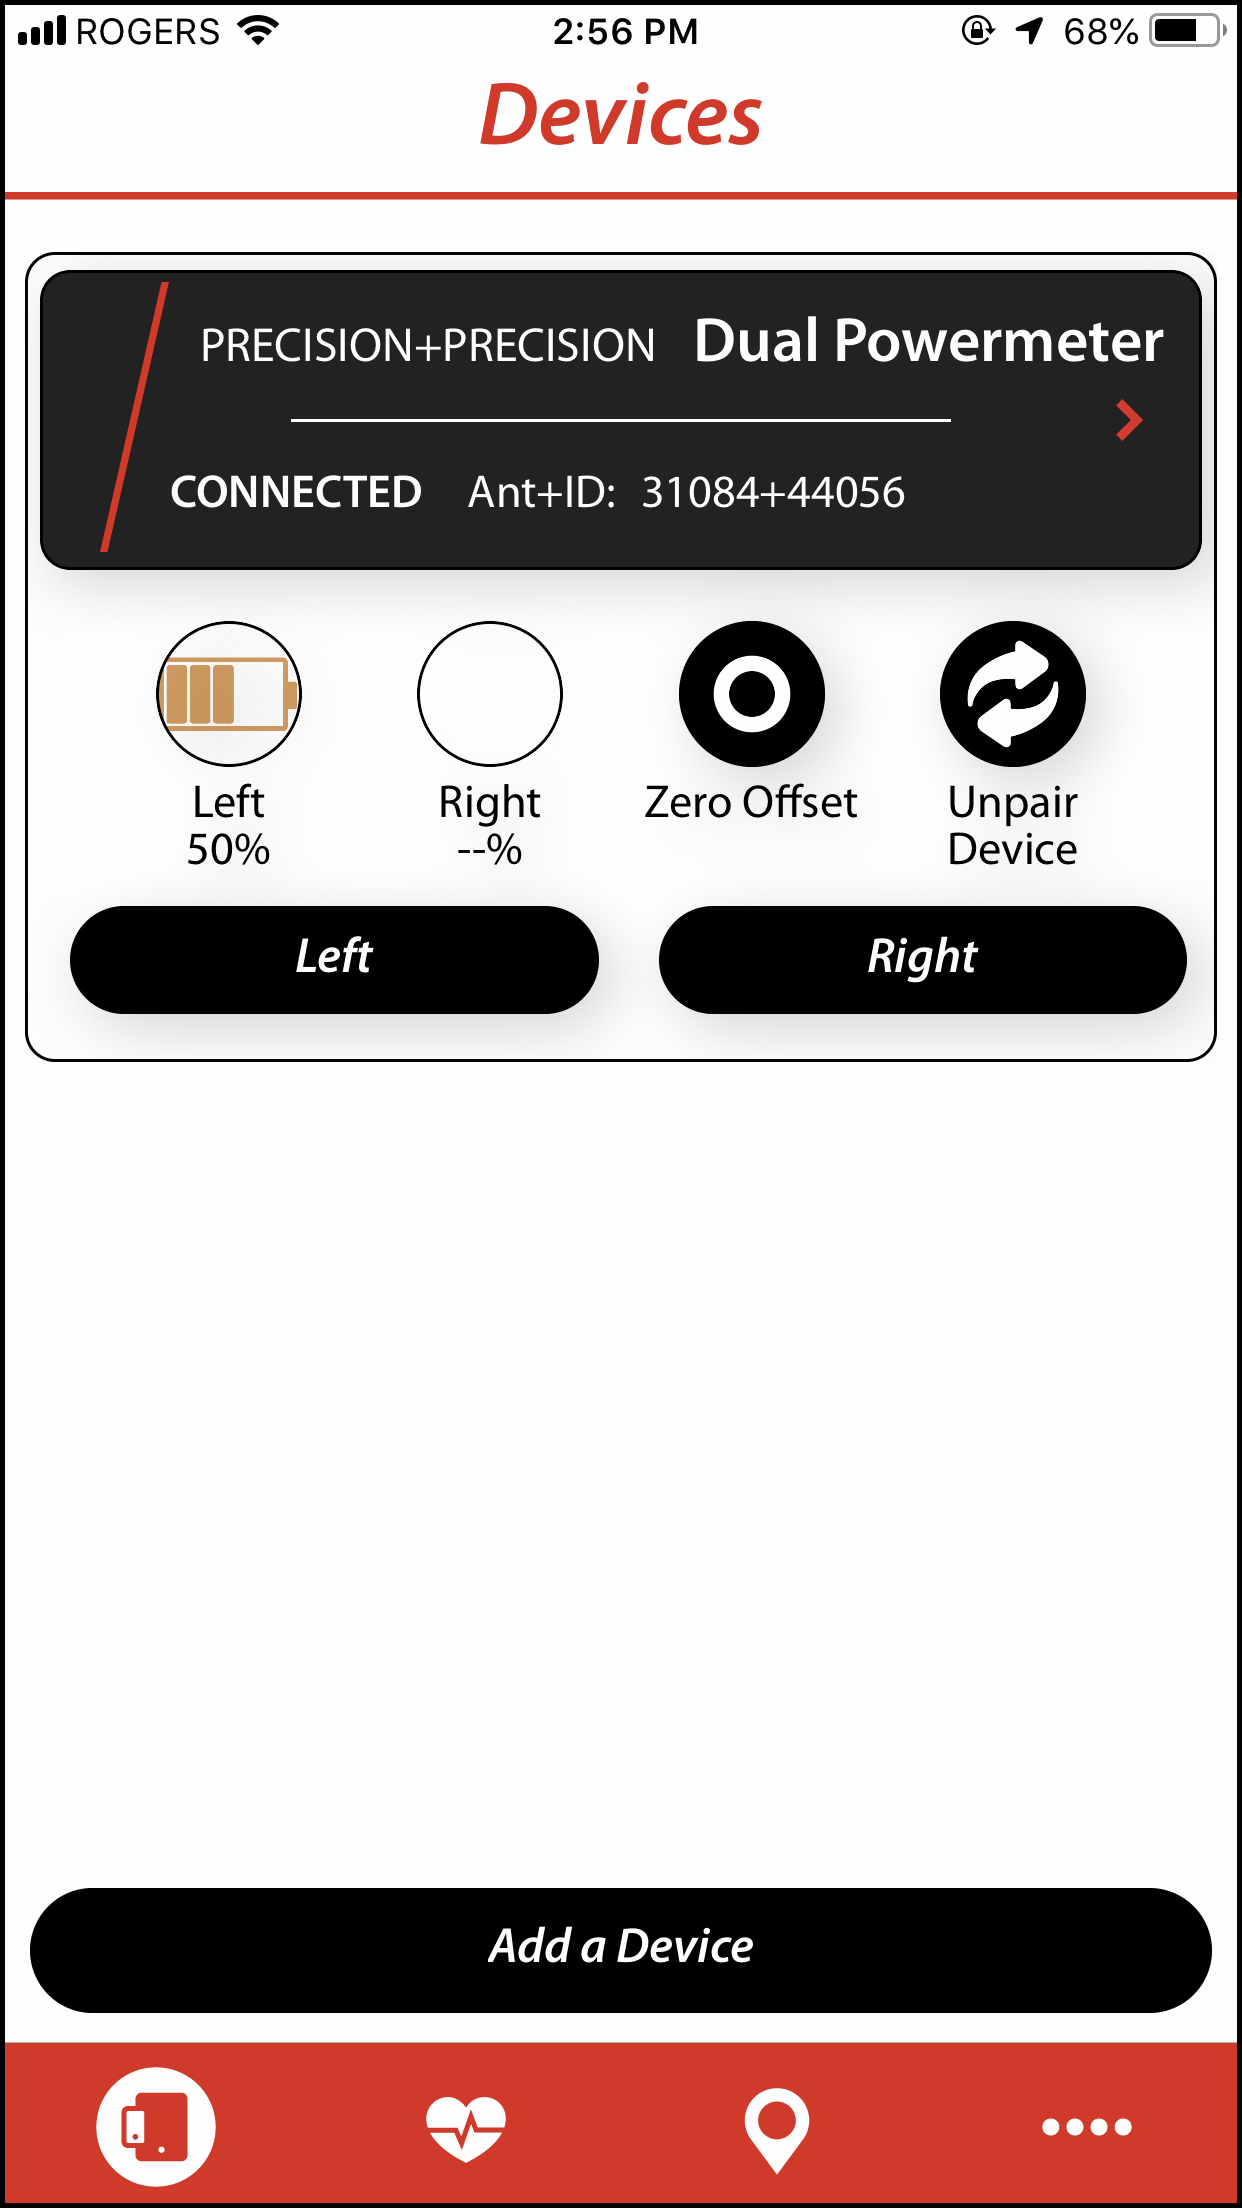
Unpairing a Dual Powermeter
- Once connected to your dual Powermeter, navigate to the Devices page.
- Click on the Unpair Device icon. Wait for a prompt indicating this was successful.
3.4
Renaming Your Powermeter
- After connecting to your powermeter, click on the Cycling Powermeter field. This will open up the Device Settings screen.
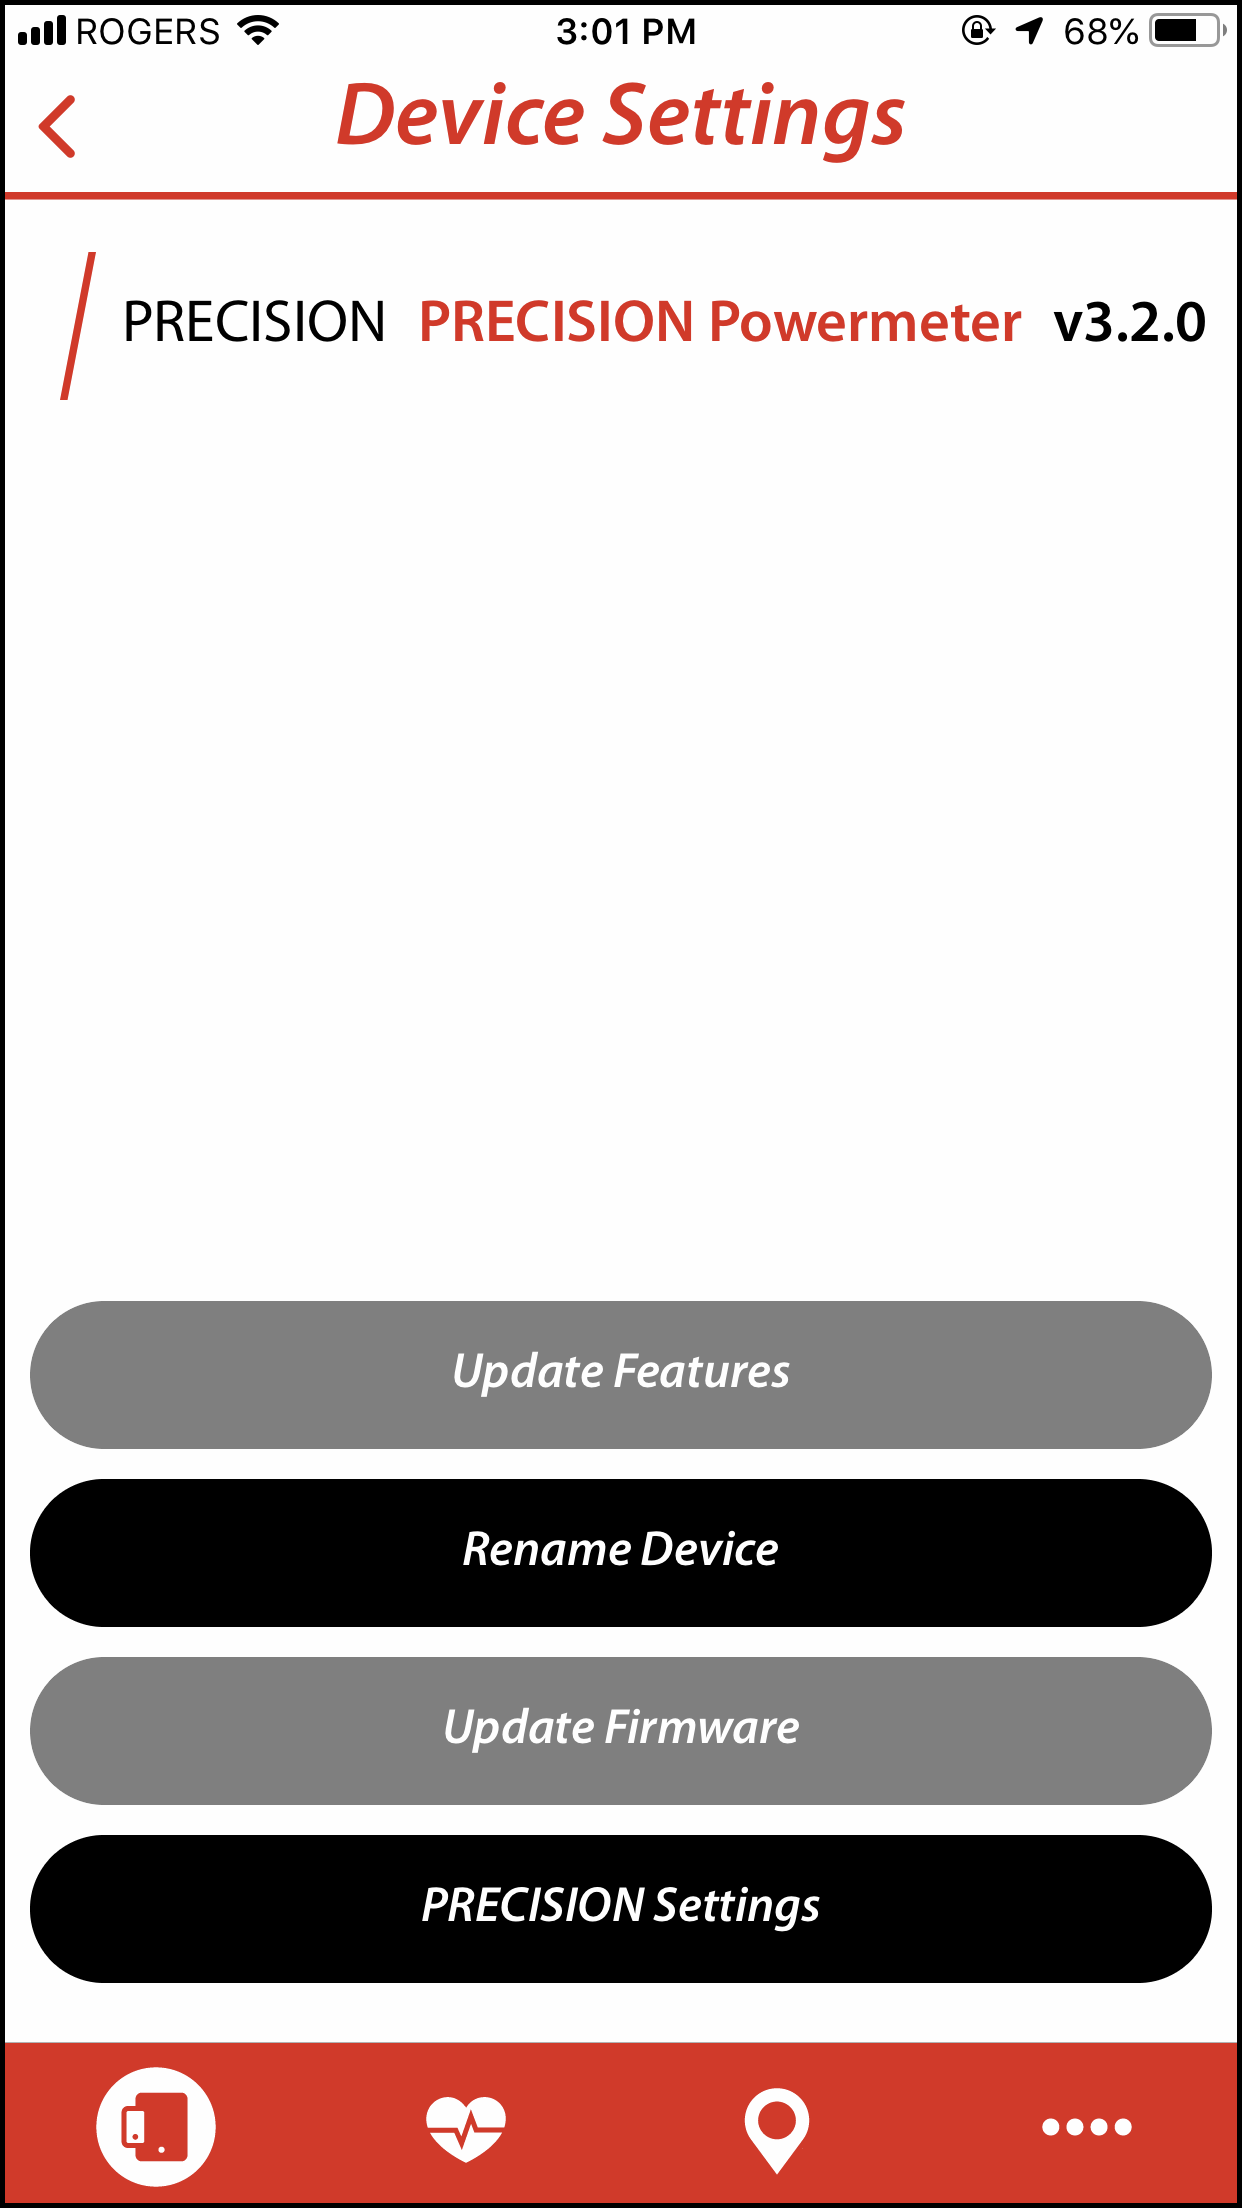
- Click on the Rename Device button. This will open up a screen to allow you to personalize the device name. This name will appear whenever you connect to the powermeter using a Bluetooth® connection.
Tiiiip: You can only use alphanumeric characters for naming and the maximum length is 9 characters.
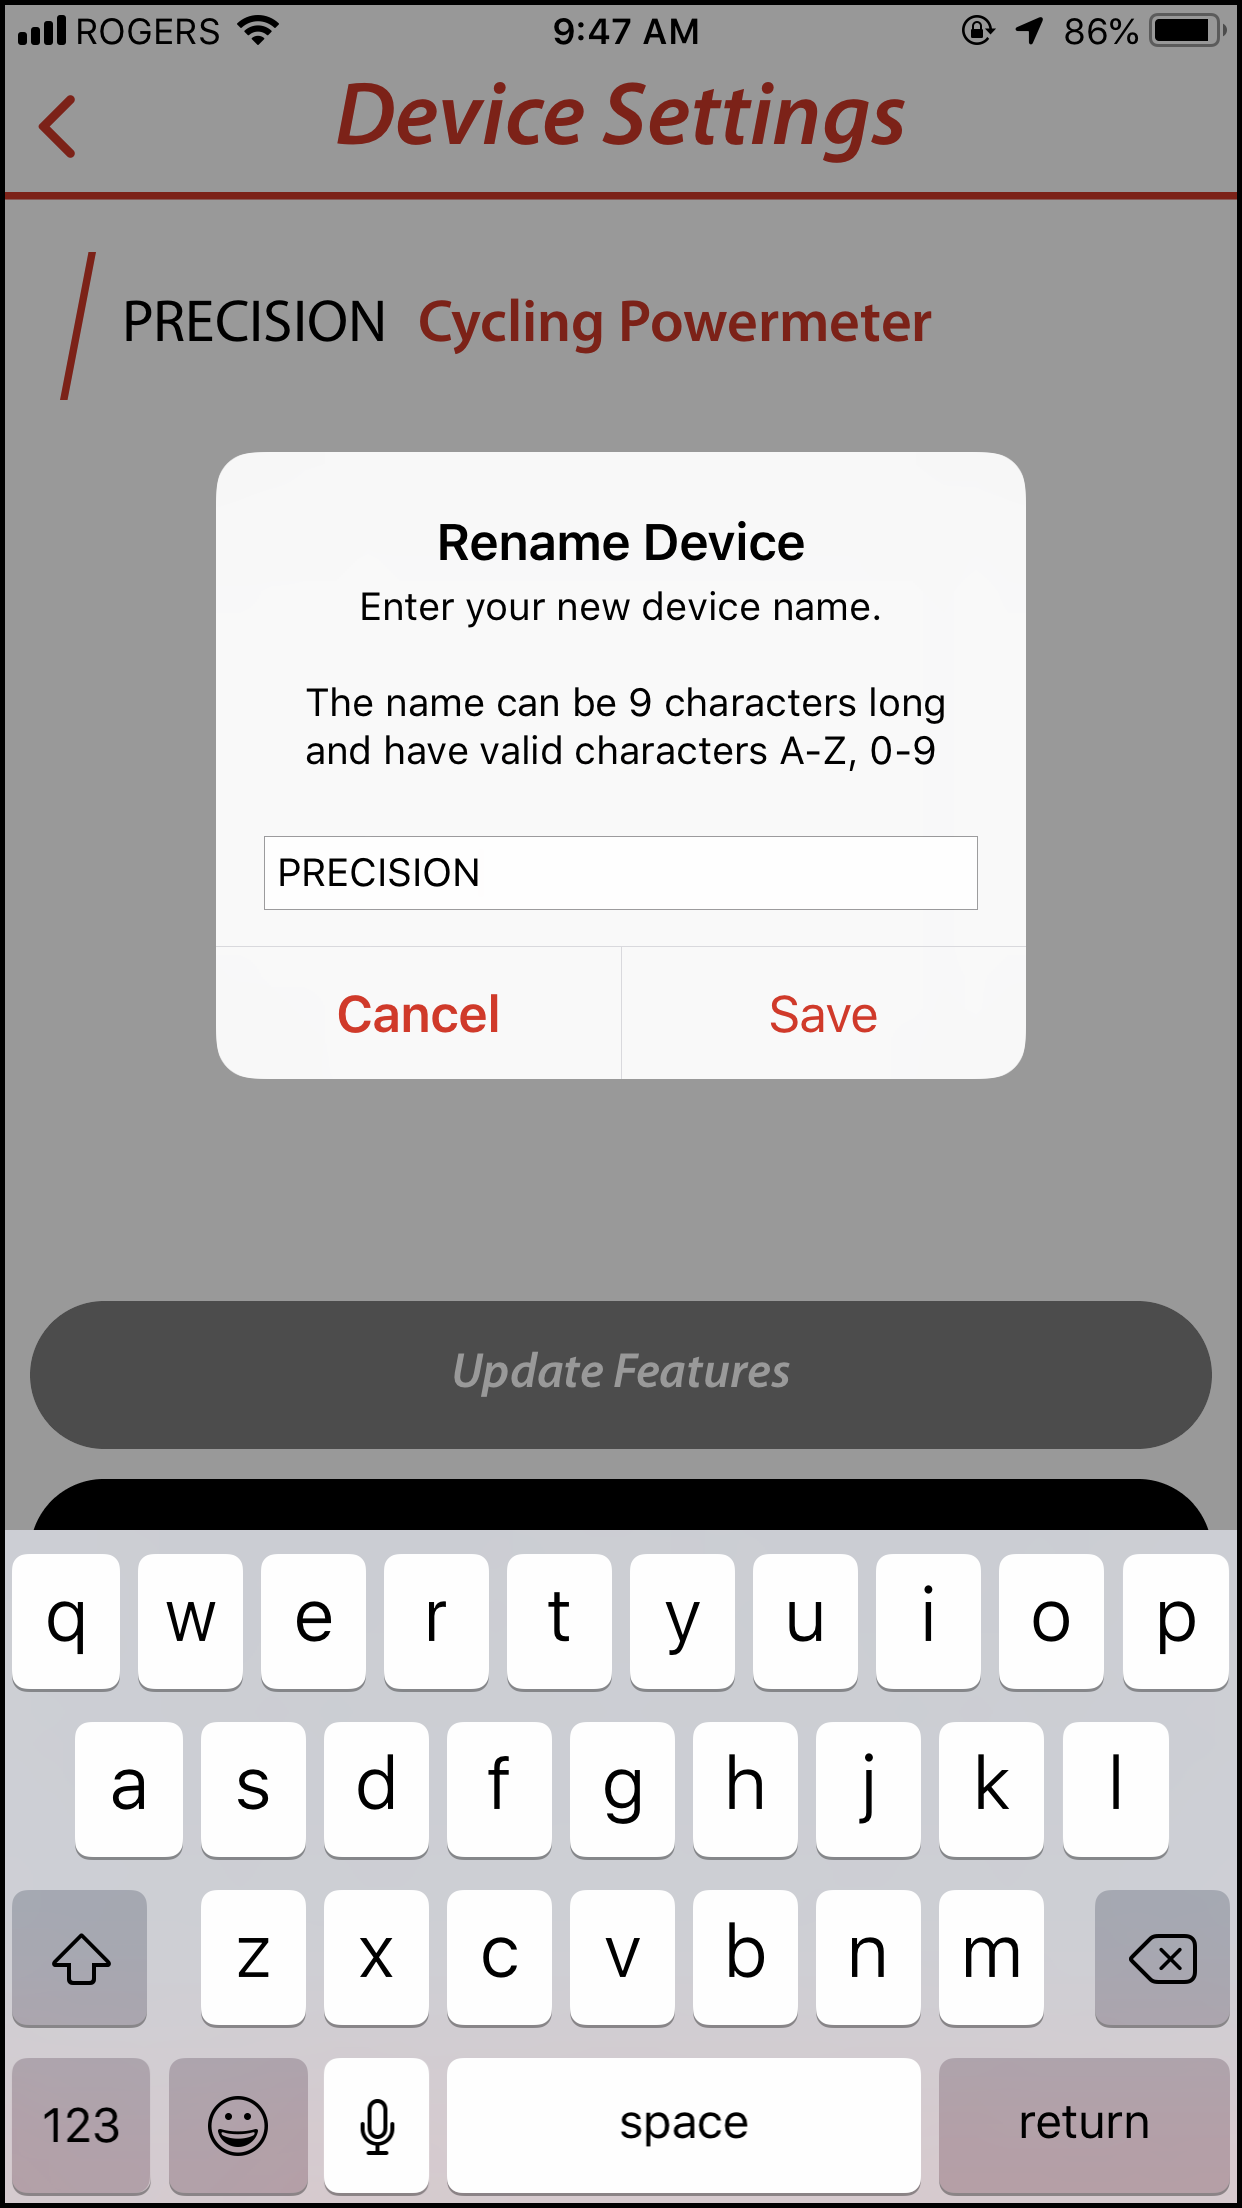
- Once you are finished, click Save.
Tiiiip: The same process can be done on a dual powermeter. Simply tap on the Dual Powermeter field and you can then access the settings of either the left or ride side by clicking the Left or Right buttons, respectively.
3.5
Performing a Zero-Offset
- Once connected to your Powermeter, navigate to the Devices page.
- Position your crank arms at 6 and 12 ‘o clock and hold the bike still.
- Click on the Zero Offset icon. Wait for a prompt that this was successful.
3.6
Updating Device Firmware
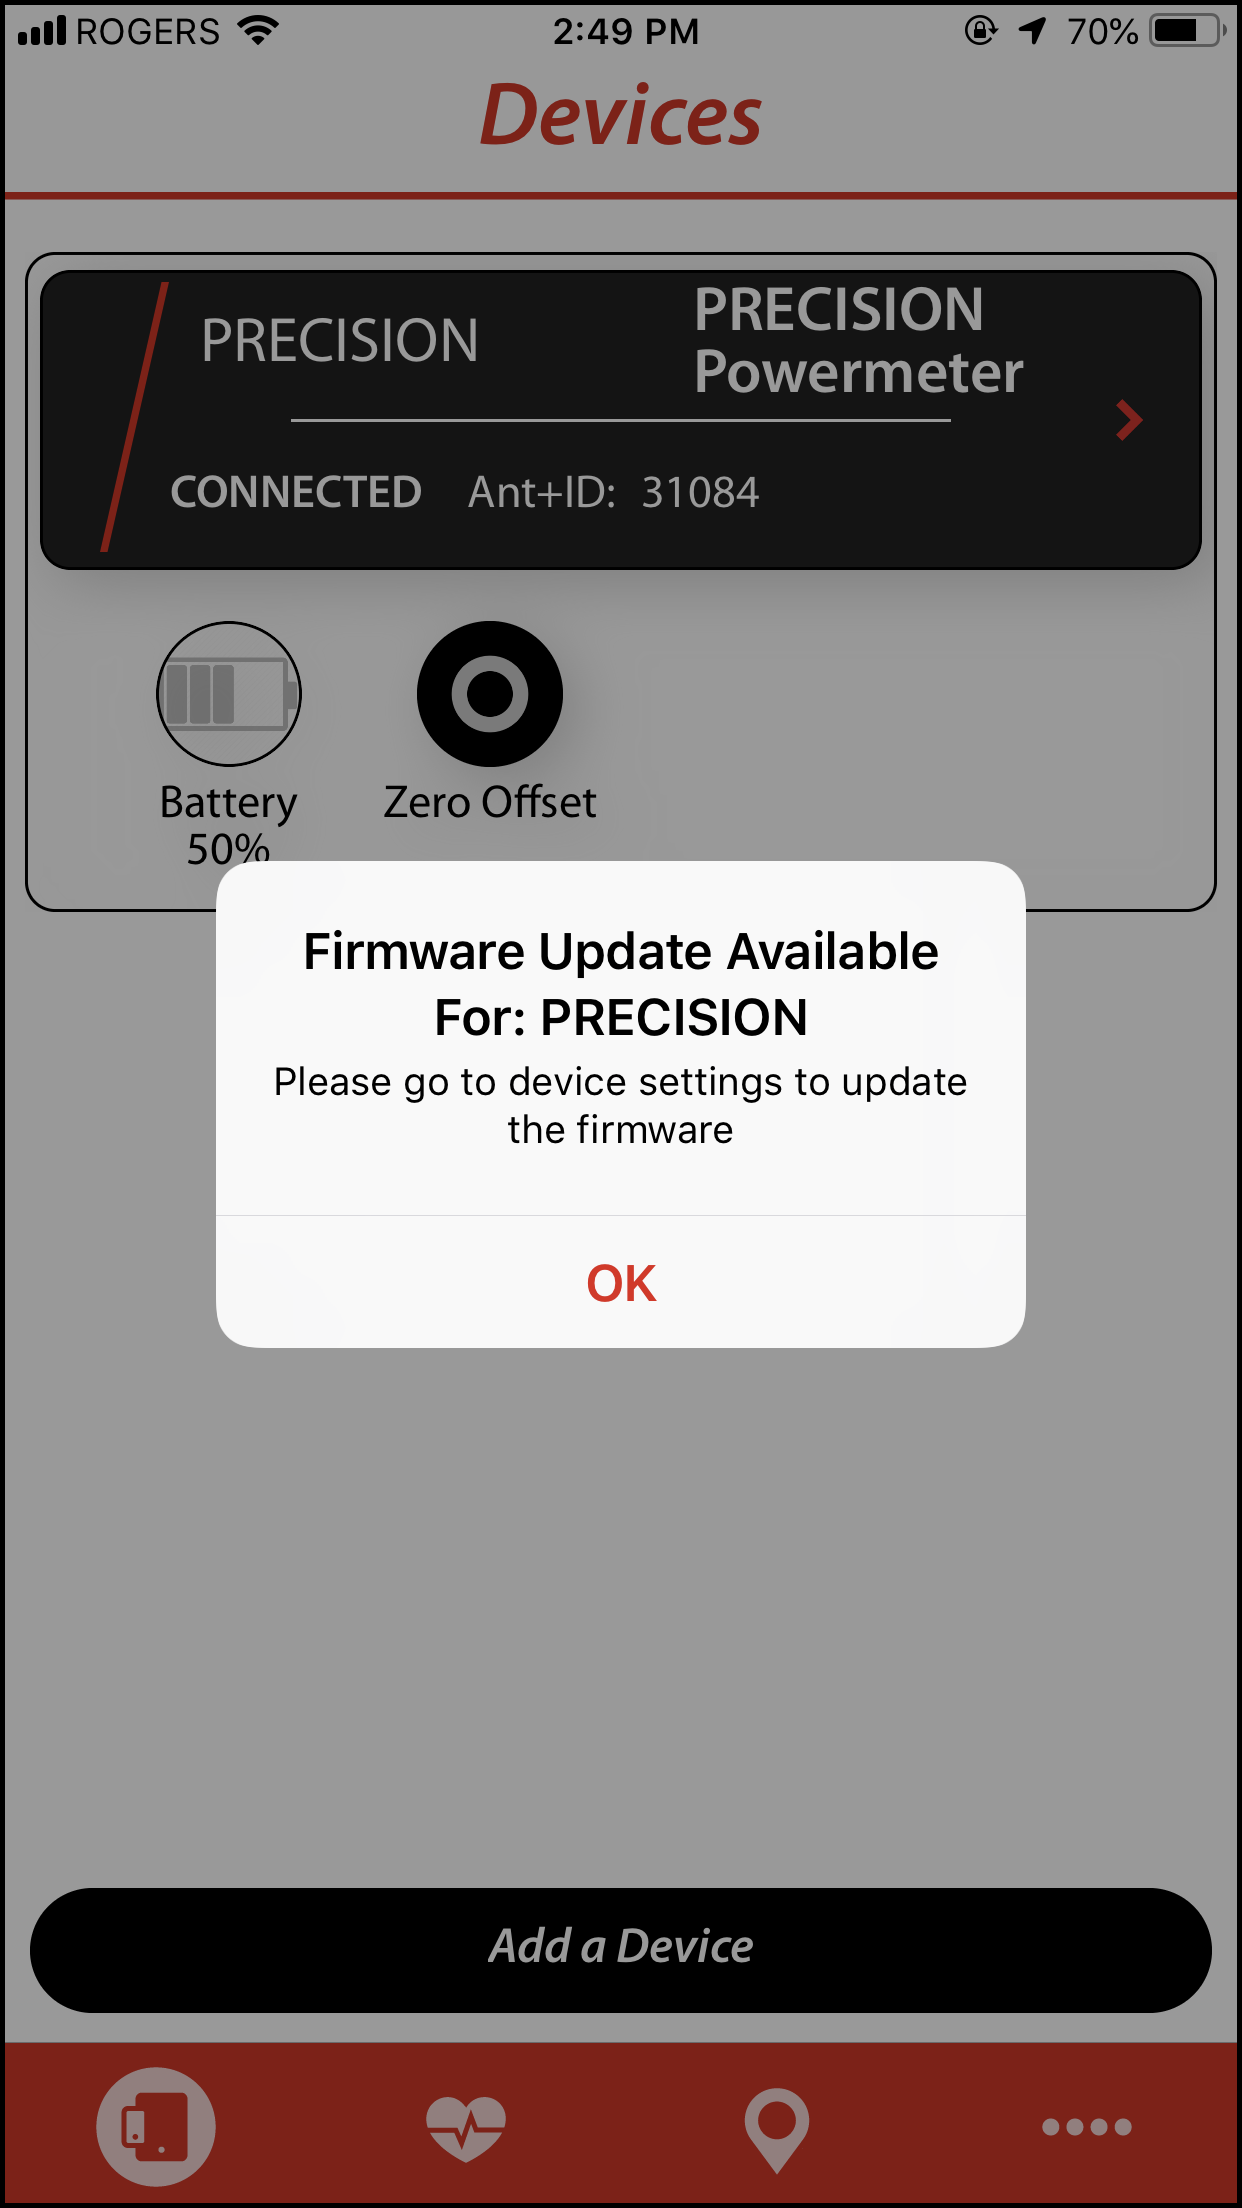
- If a new firmware update is available, you will be prompted when you connect to your 4iiii Powermeter.
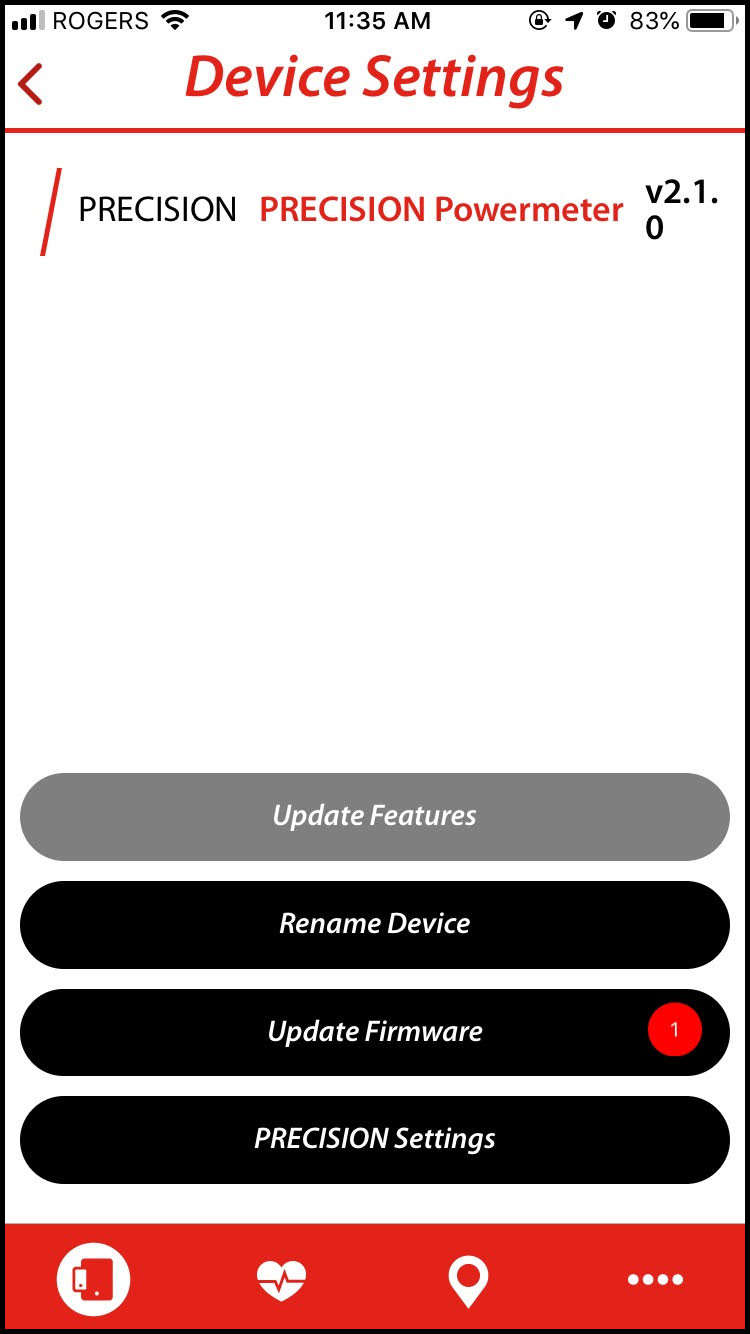
- Go to the device settings and you should see an icon on the Update Firmware button. Click this button to begin the firmware update.
Tiiiip: Do not close the app during a firmware update.
3.7
Accessing Device Settings
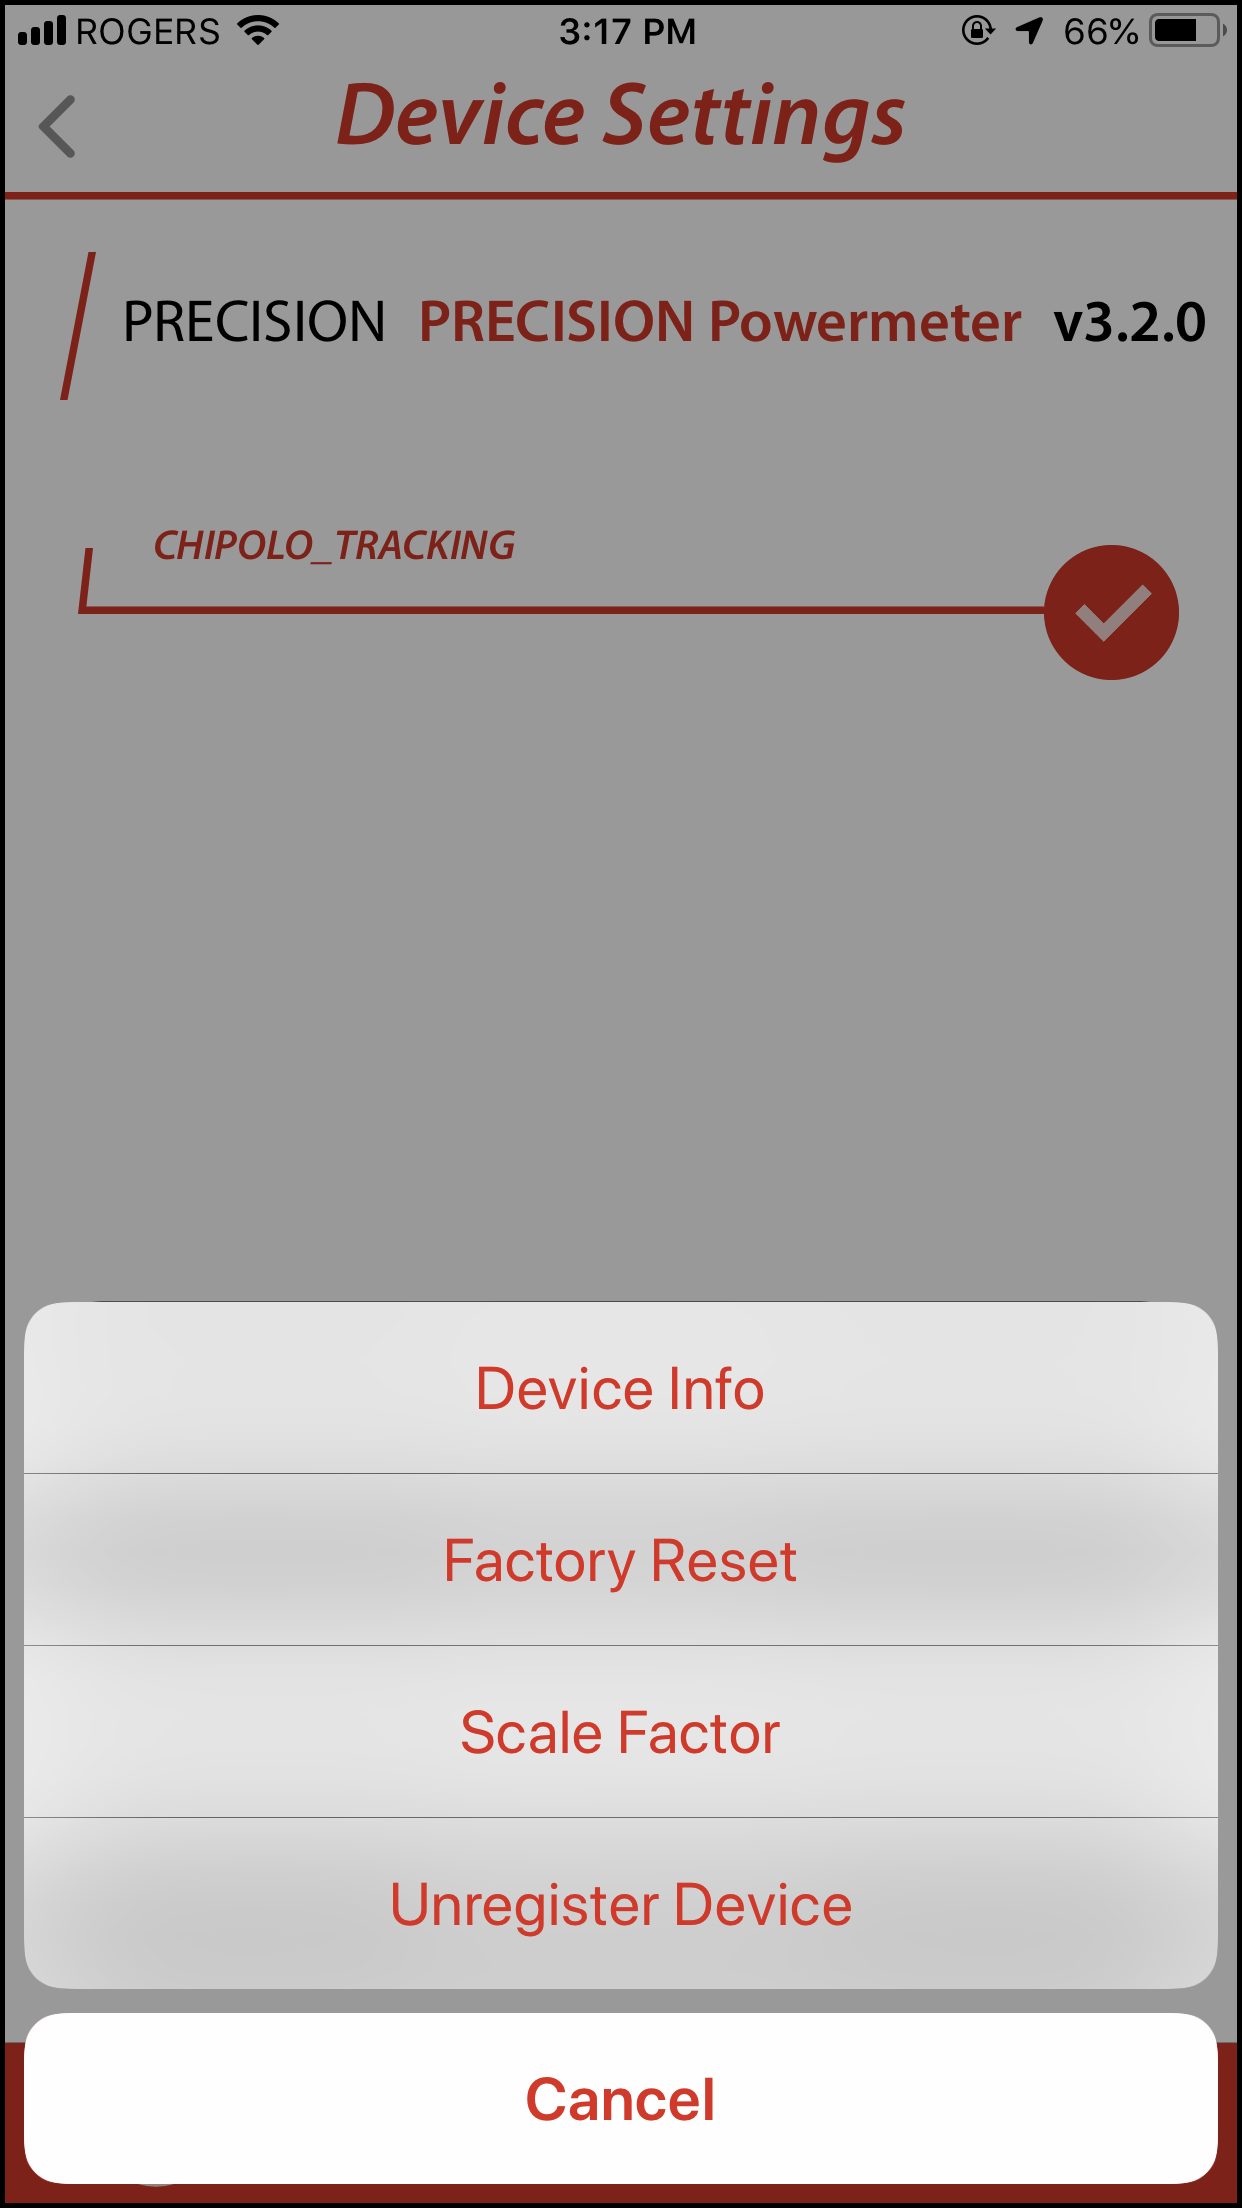
- Once connected to your powermeter, navigate to the Device Settings page.
- Click on PRECISION Settings to access the following features:
- Device Info: Provides device name, ANT ID, device type, serial number, firmware version, boot version and SD version.
- Factory Reset: This may be a useful tool in troubleshooting powermeter issues. Please contact customer service.
- Scale factor: This allows you to adjust for a left/ right leg imbalance when using a single side powermeter. For example, if you produce 49% of your power with your left leg, put in a scale factor of 1.02 in to give an accurate total power, if 48% left leg, put in a scale factor of 1.04.
- Unregister Device: Once features are added to your powermeter, it will now be registered to your 4iiii account. If you want to transfer features such as the Finder Feature to another phone or account, click this button to unregister the powermeter.
3.8
Connecting to Another Powermeter
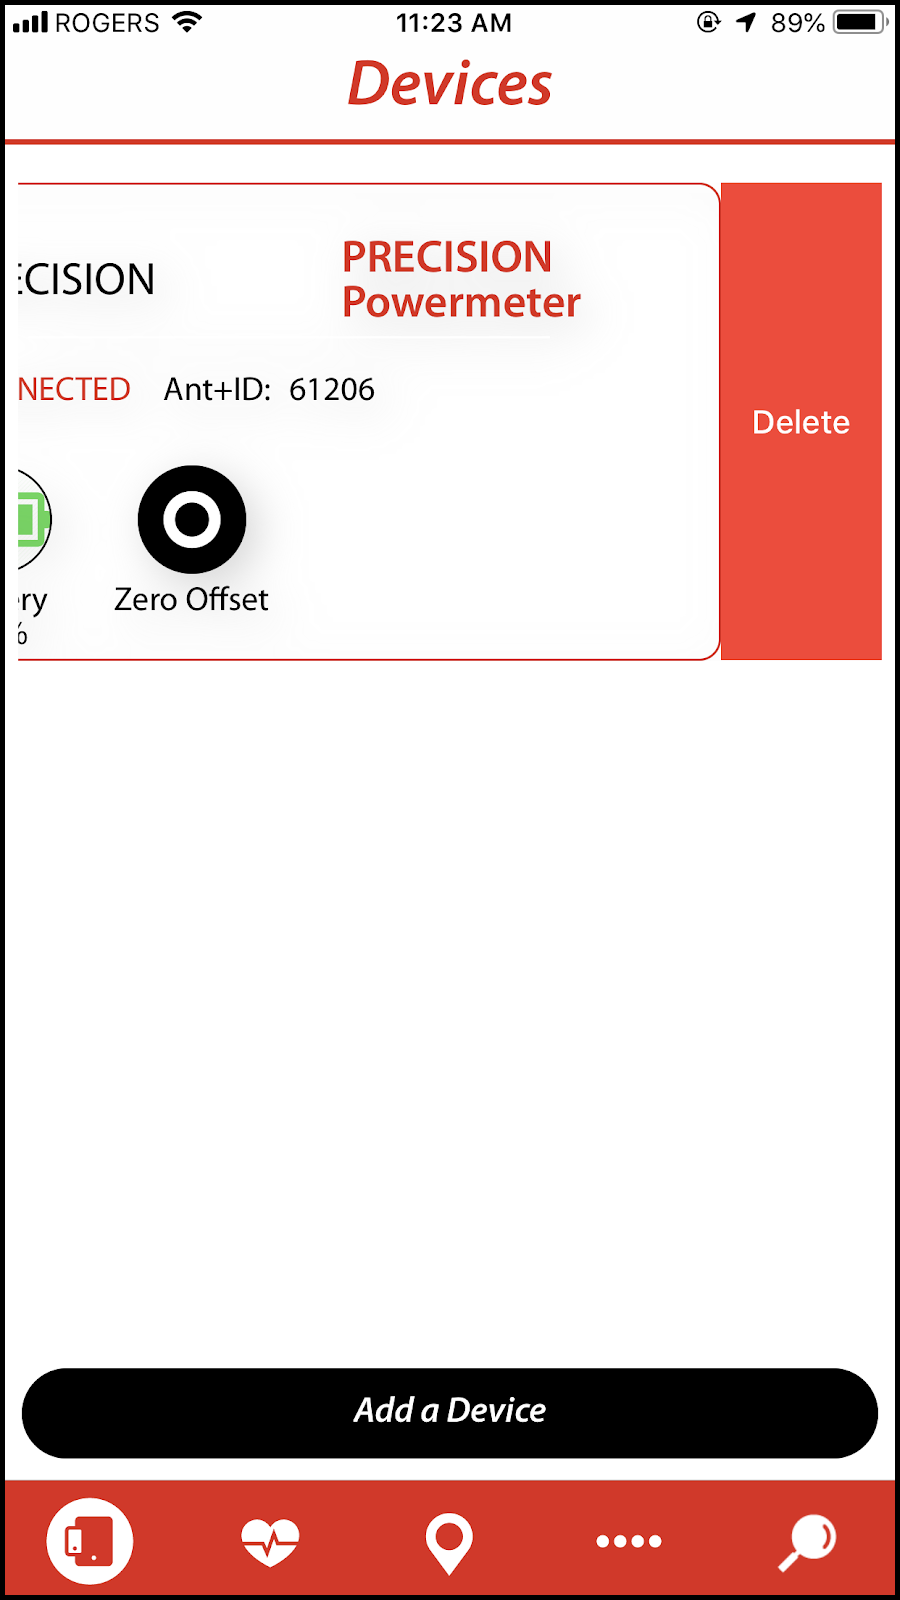
- To remove a powermeter from the app, swipe left on the power to uncover a Delete Button. Press this to forget this powermeter. Tiiiip: You can only connect to one single-side powermeter at a time. No other single-side powermeters will show up in a search.
4.0
CHIPOLO FINDER FEATURE
4.1
Enabling the Chipolo Finder Feature
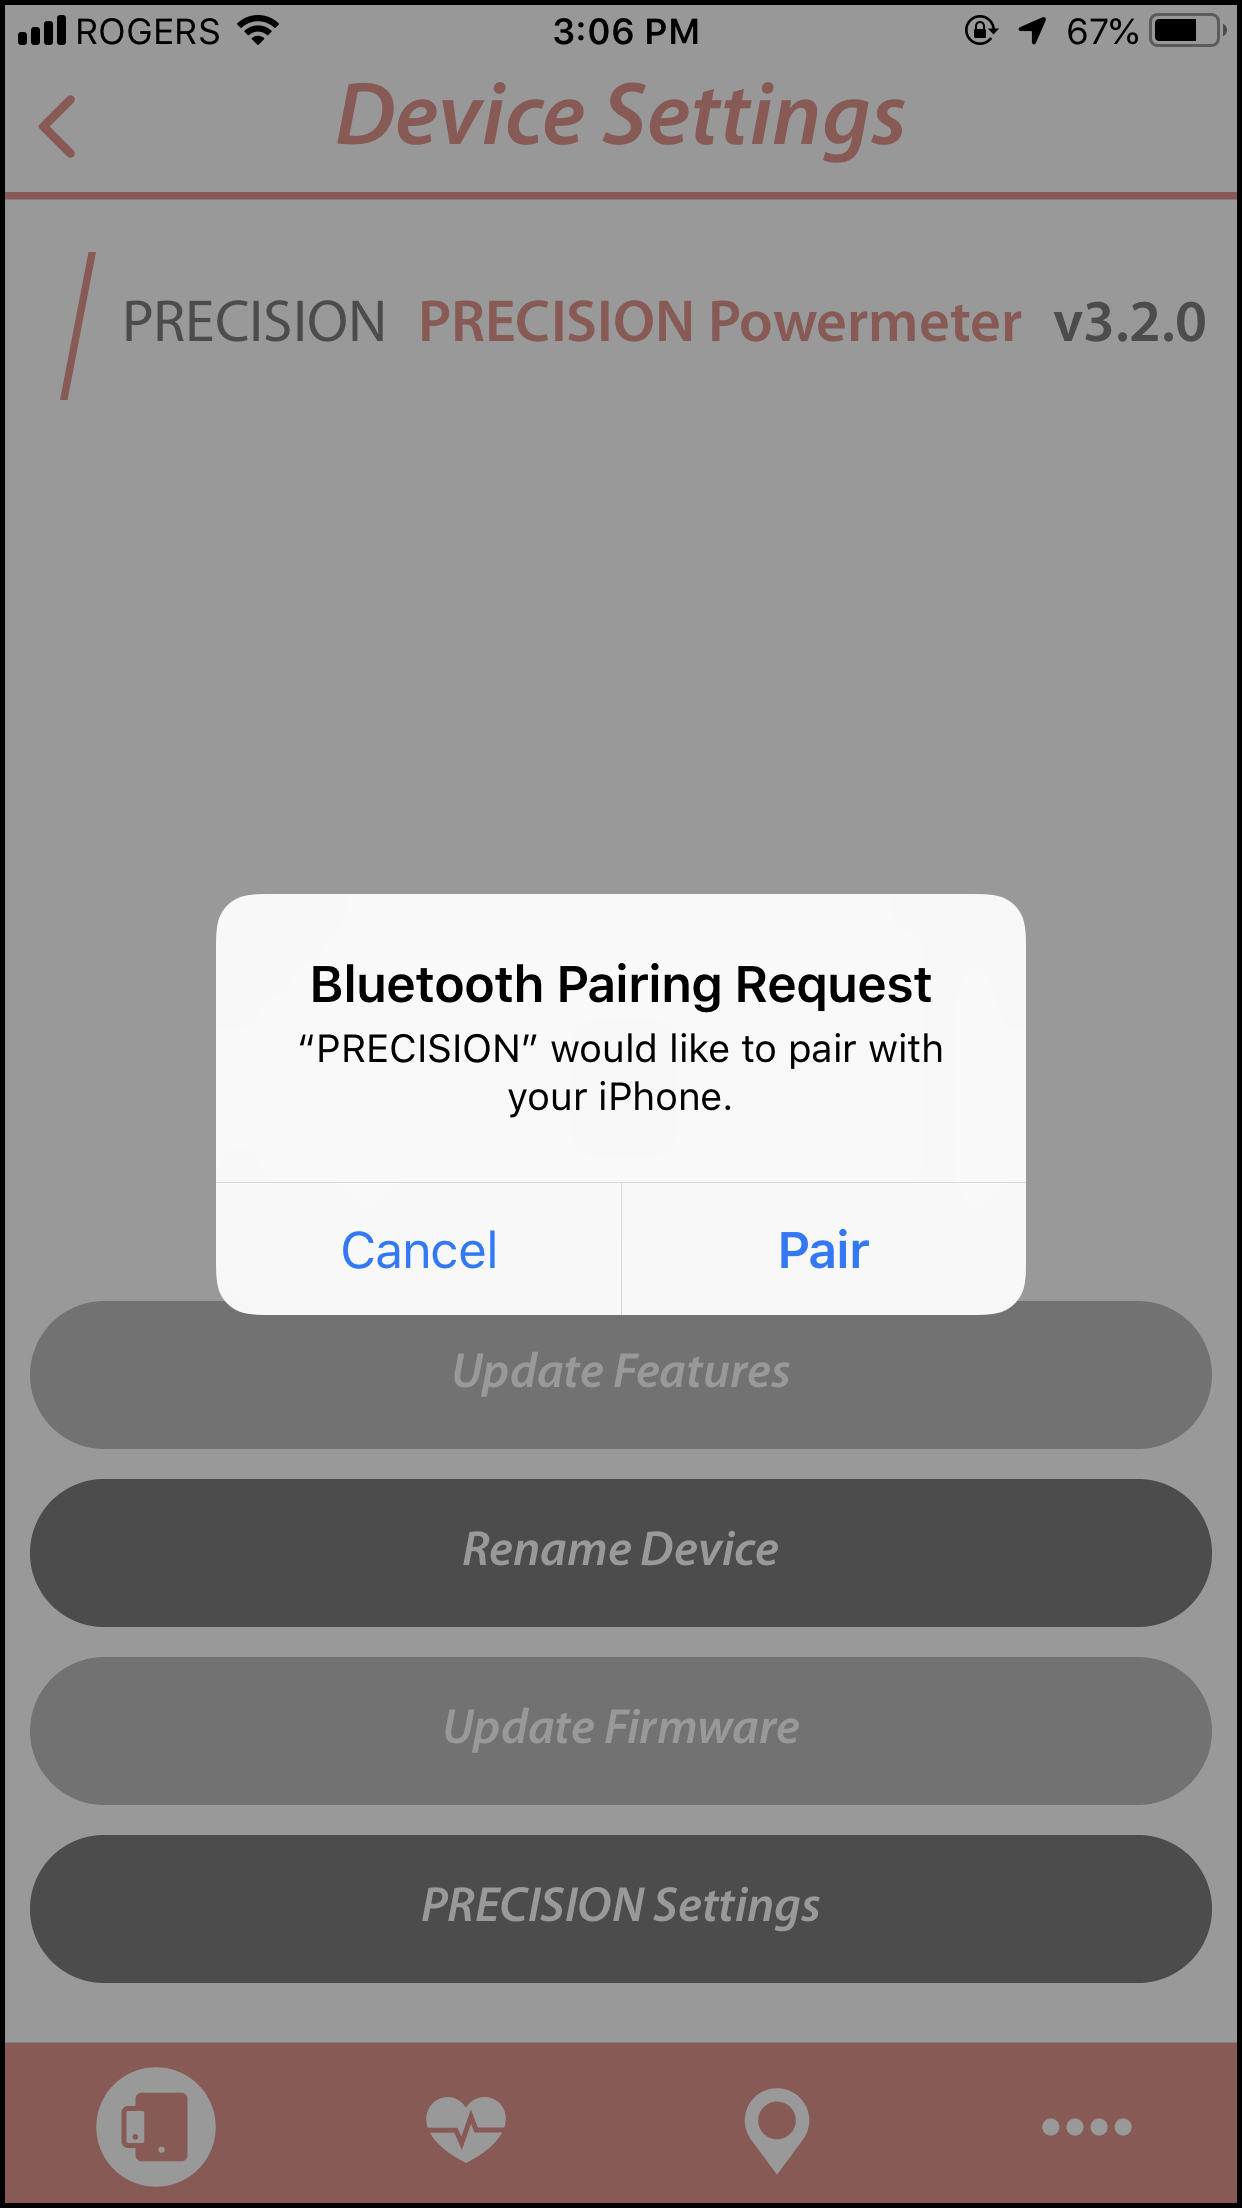
- Connect to your powermeter and navigate to the settings page. If this is the first time accessing the device settings, you will be prompted to Bluetooth pair. Click “Pair”.
Tiiiip: This pairing will register your powermeter to your 4iiii app account.
- Select the “Update Features” icon.
Tiiiip: If there is a new feature, you will see a red icon indicating the number of features available for upgrade.

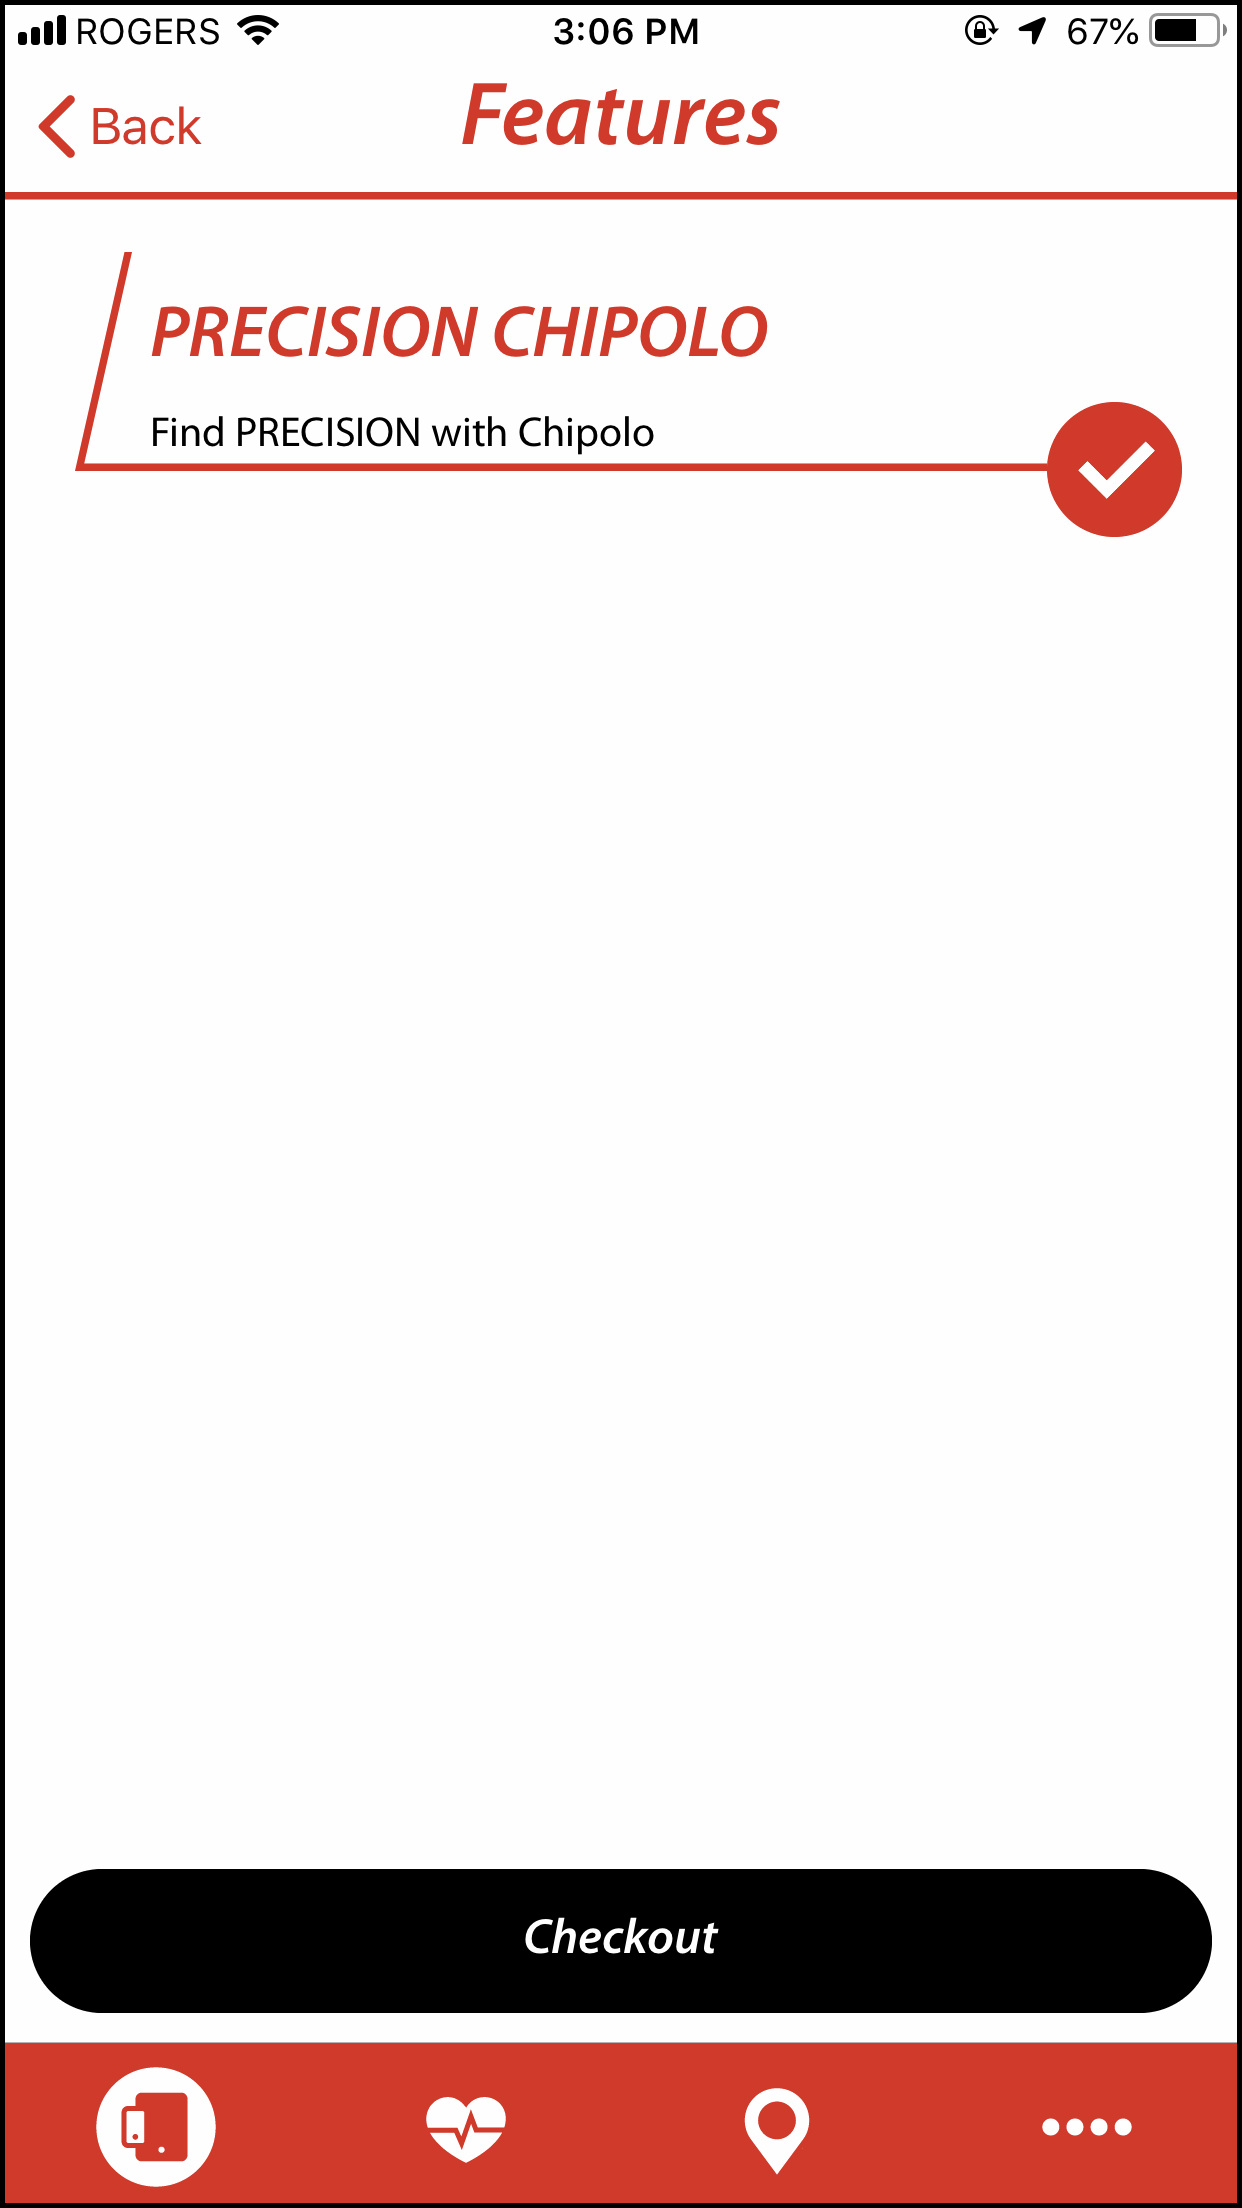
- Select the PRECISION CHIPOLO feature (should be $0.00) and click checkout.
Tiiiip: For purchasable features, you will be brought to a payment page to input your credit card information and complete the purchase.
4.2
Finding a Lost Device
- Click on the Finder Feature icon.
- Click on Mark as Lost/ Found.
- You will now begin getting location notifications from pings received on the Chiplo finder network.
SECTION 5.0
Viiiiva FUNCTIONS
5.1
Connecting to Viiiiva
- Wake up your Viiiiva by either rubbing on the two metal leads or by wetting the strap contacts and putting on the Viiiiva.
- Click on the Devices tab on the bottom of the app screen. Then click Add a Device.
- Select your Viiiiva from the Bluetooth Scan screen and select Connect
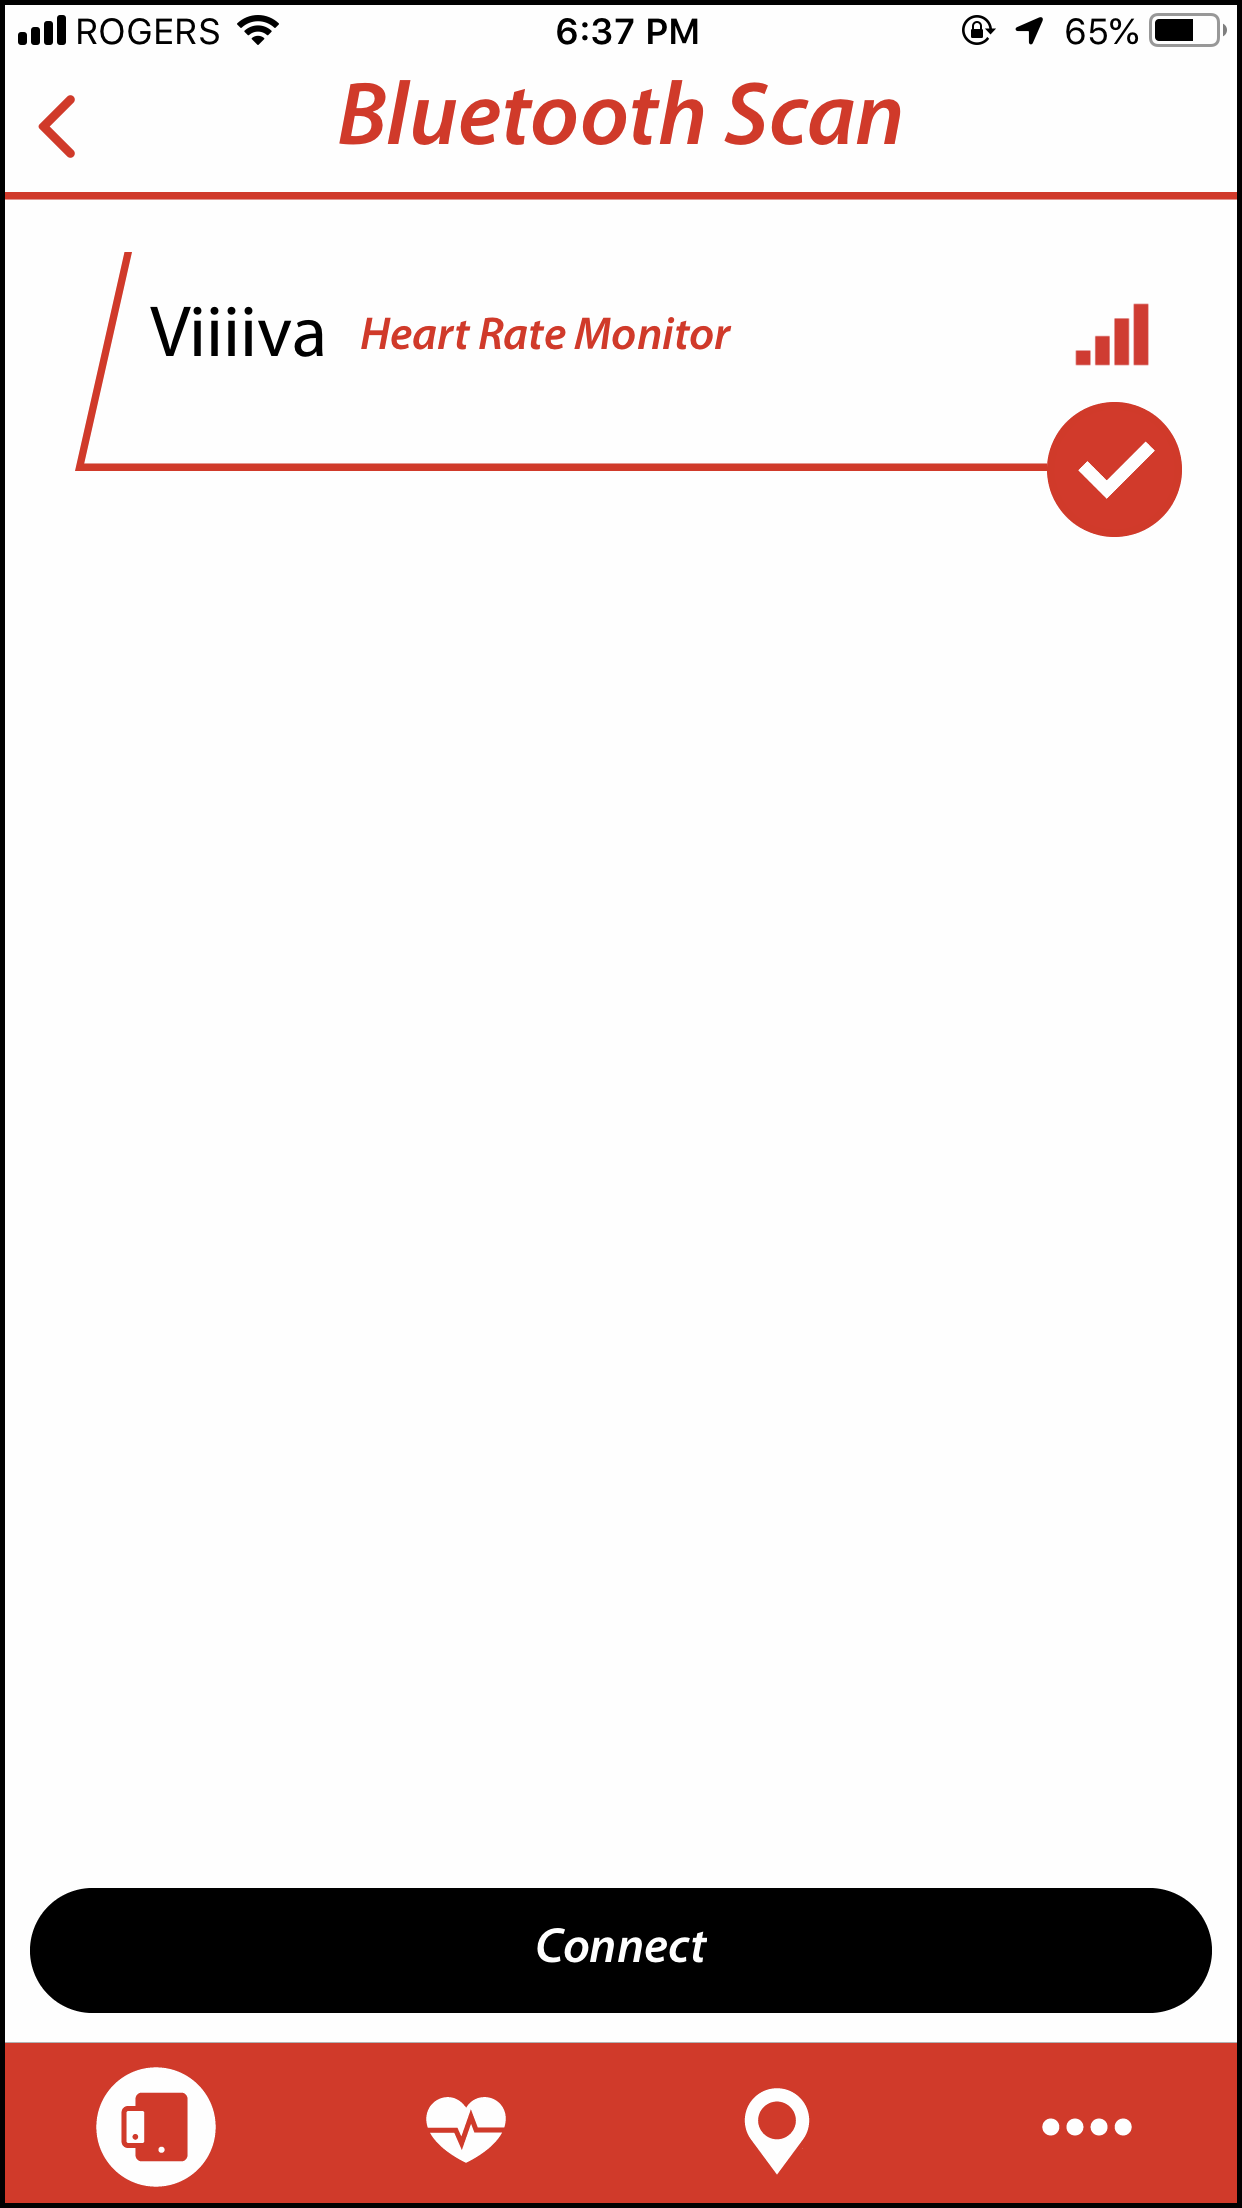
- Your Viiiiva is now connected and ready to use!
5.2
Renaming Your Viiiiva
- After connecting to your Viiiiva, click on the Heart Rate Monitor field. This will open up the Device Settings screen.
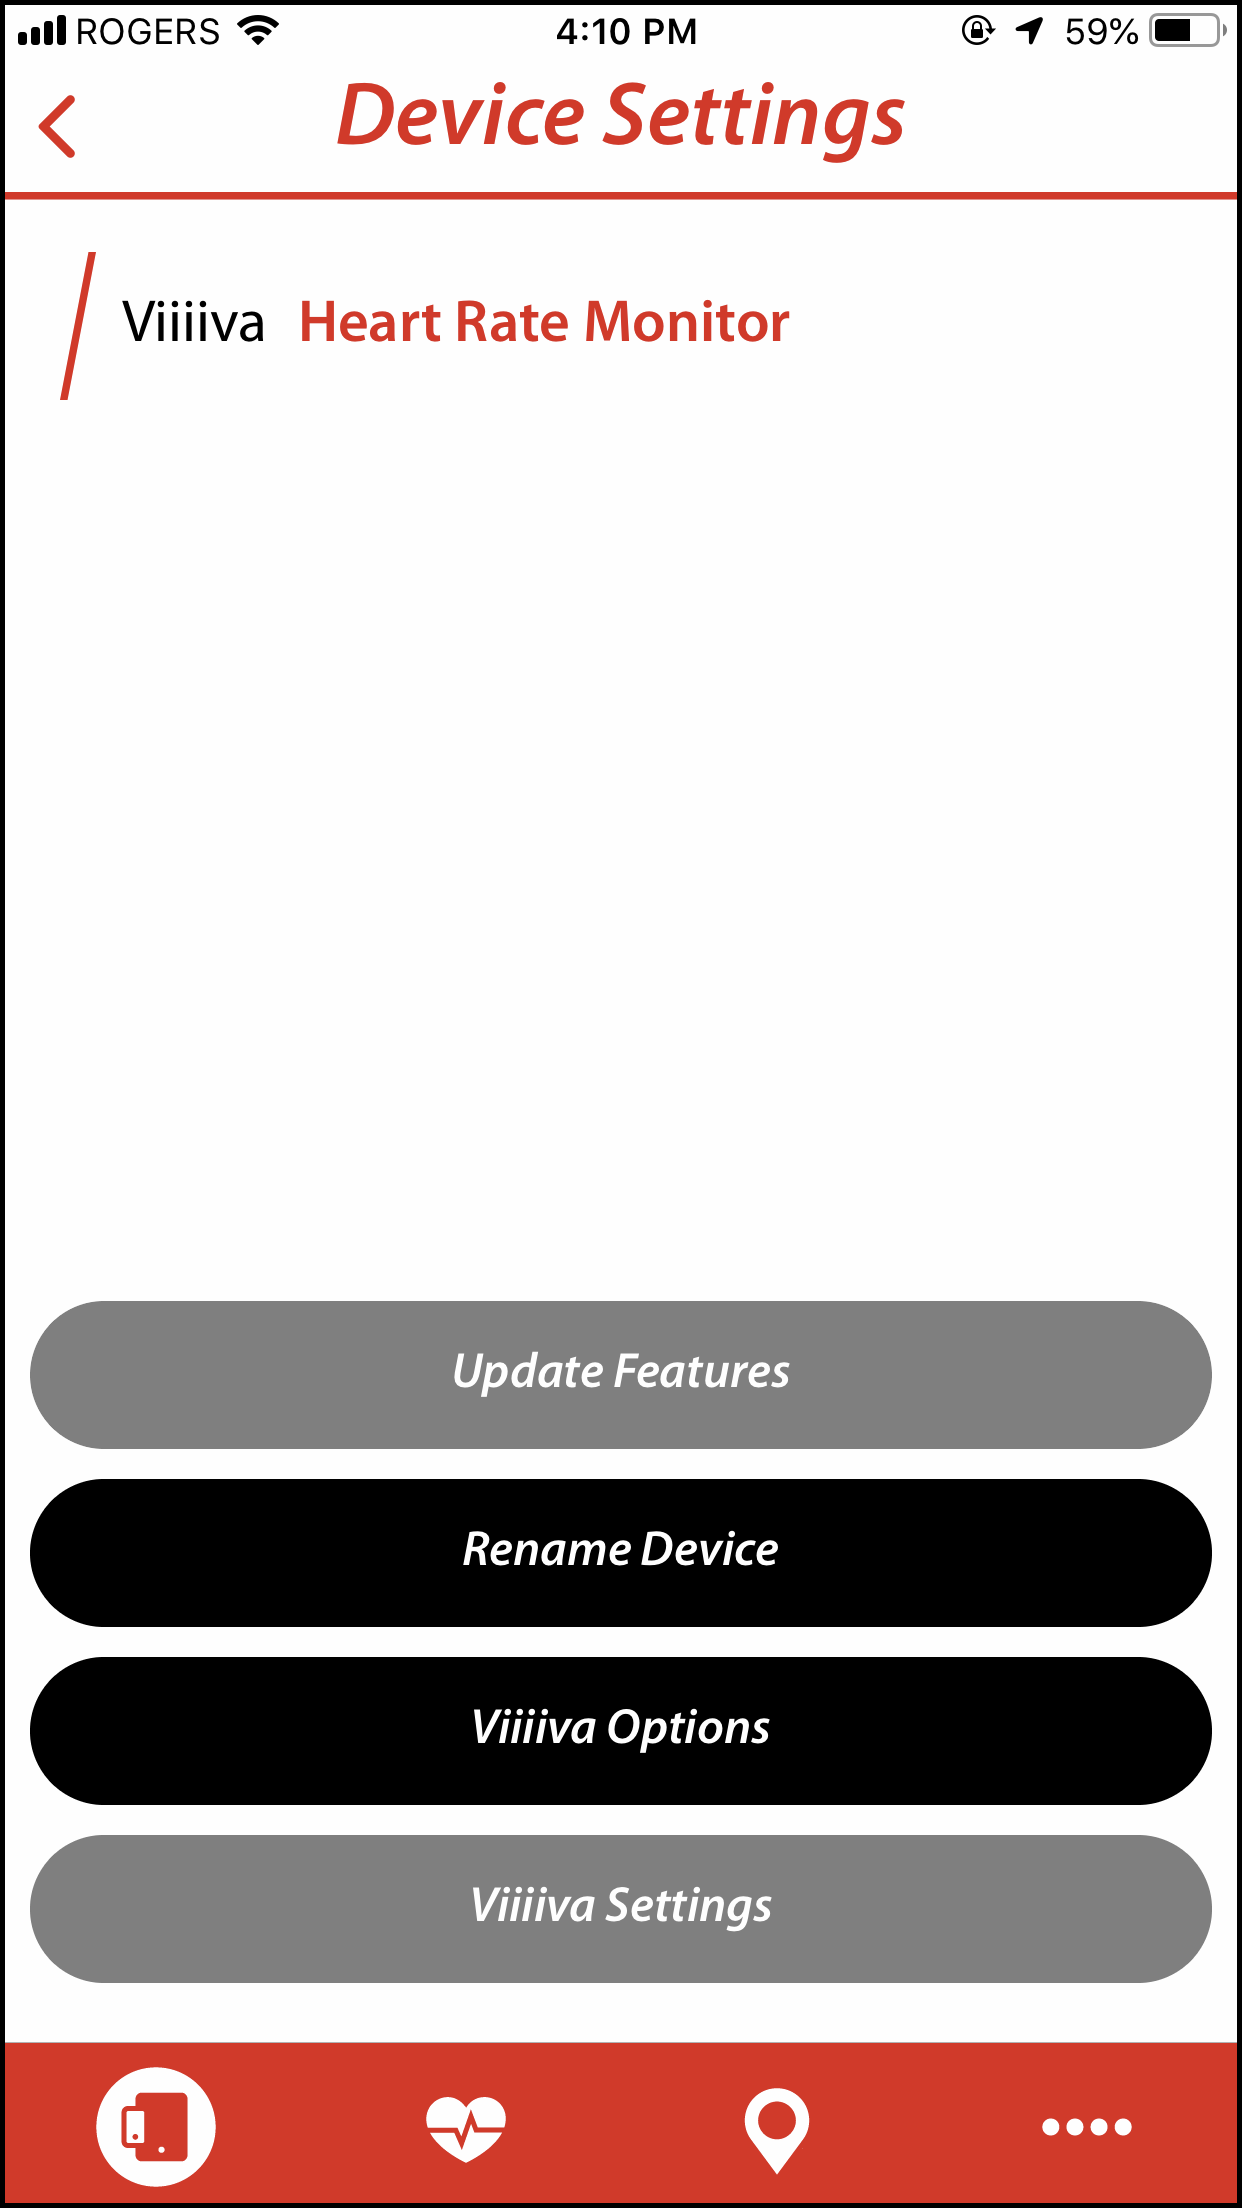
- Click on the Rename Device button. This will open up a screen to allow you to personalize the device name. This name will appear whenever you connect to the powermeter using a Bluetooth® connection.
Tiiiip: You can only use alphanumeric characters for naming and the maximum length is 9 characters.
- Once you are finished, click Save.
5.3
Connecting Other Devices to Your Viiiiva (Pass Through)

- After connecting to your Viiiiva, click on the Heart Rate Monitor field. This will open up the Device Settings screen.
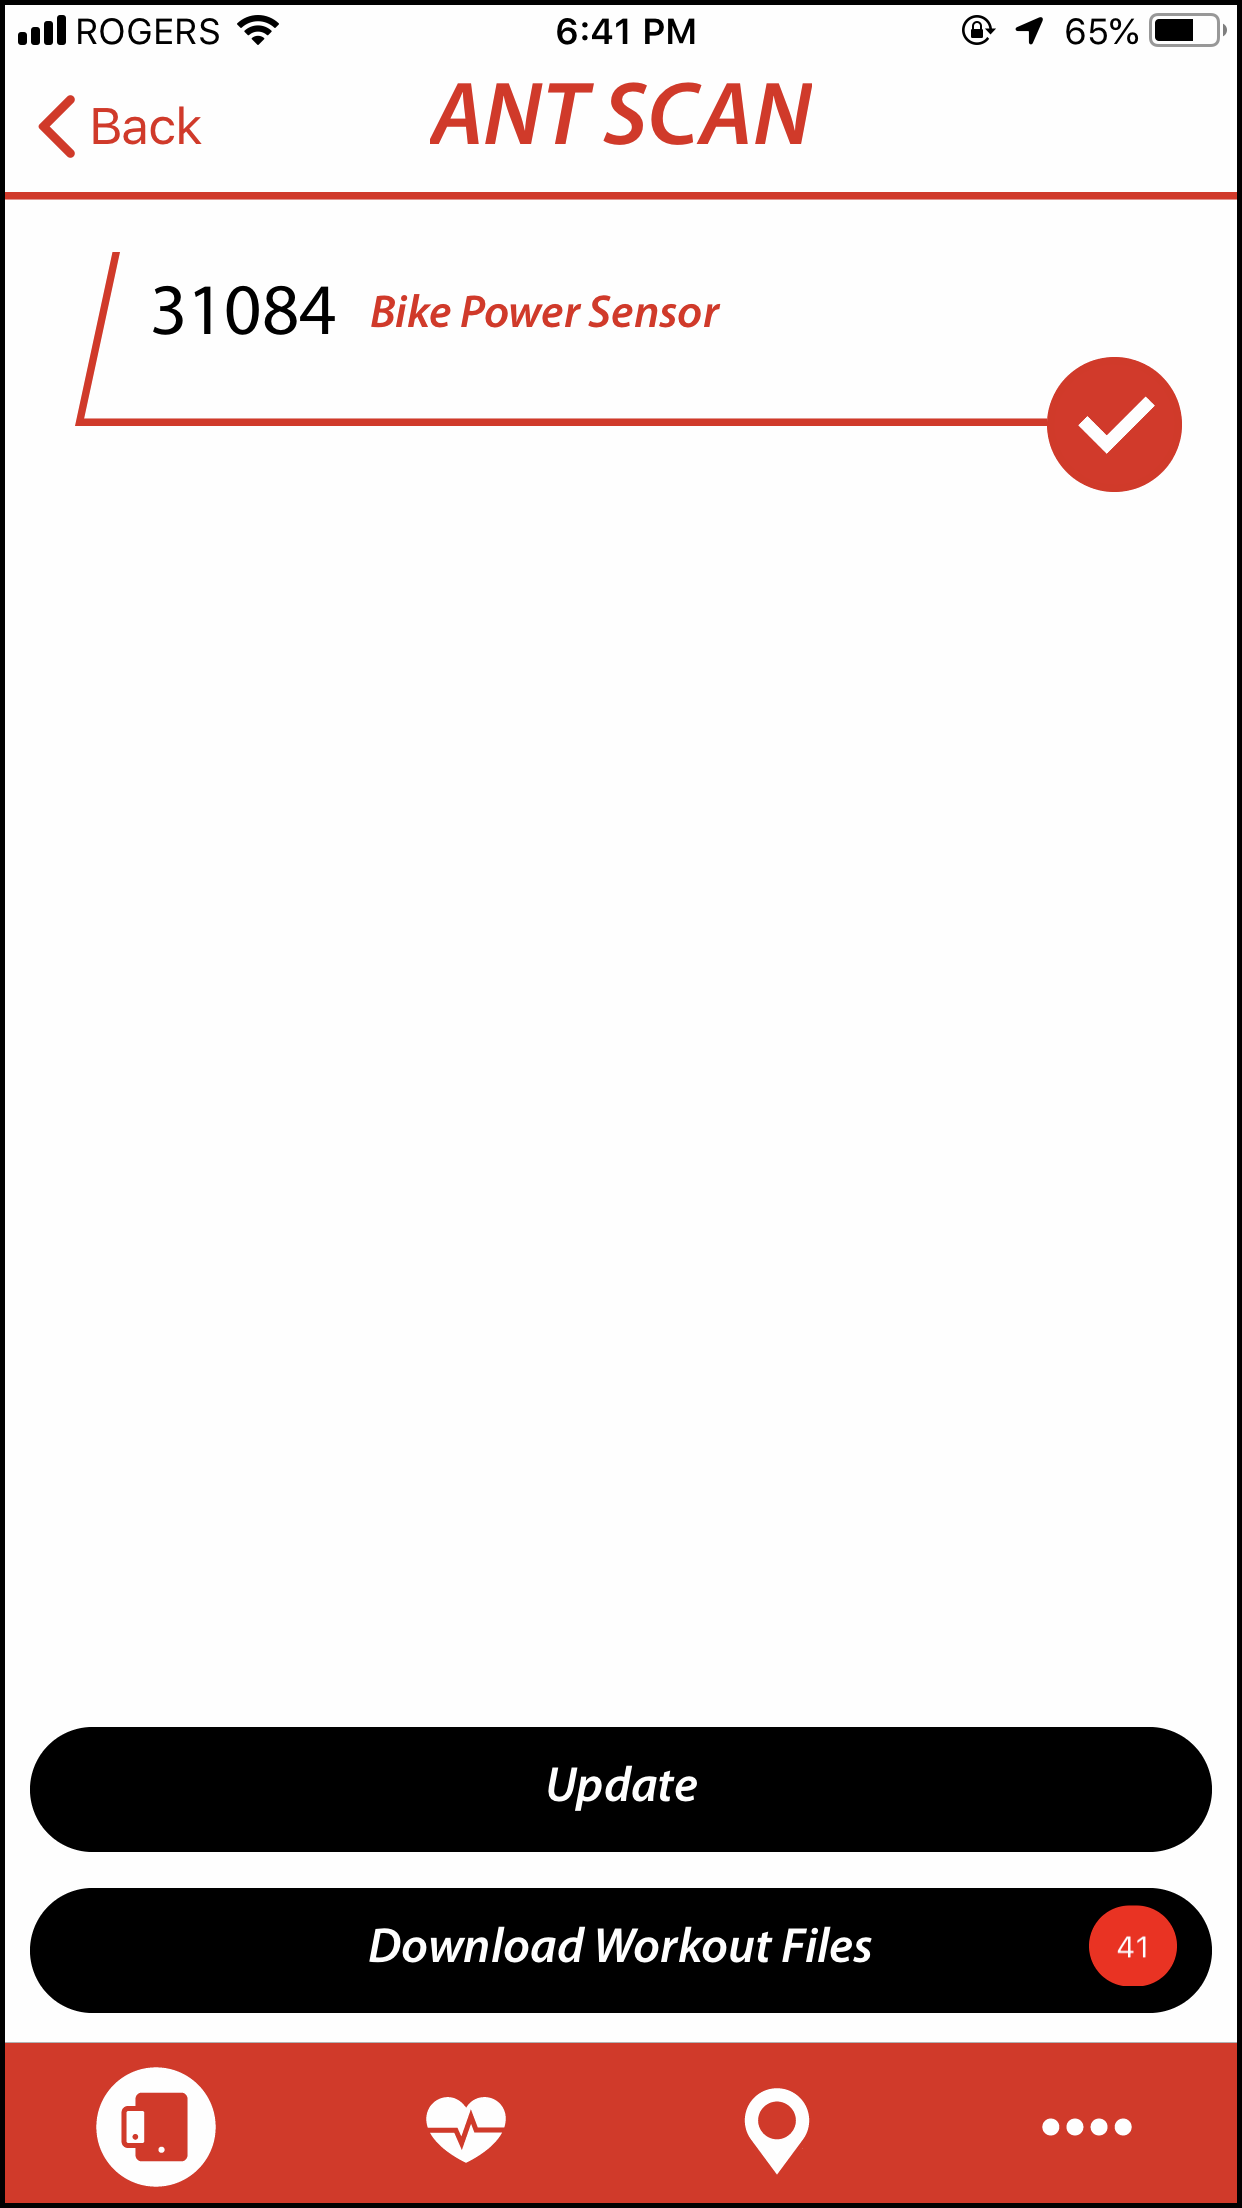
- Click on the Viiiiva Options button. Click on the device you would like to pair to your Viiiiva and click the Update button. Whenever the paired device is awake and your Viiiiva is on, the Viiiiva will be recording data and transmitting via Bluetooth along with the Viiiiva data.
5.4
Downloading Saved Workouts from Your Viiiiva
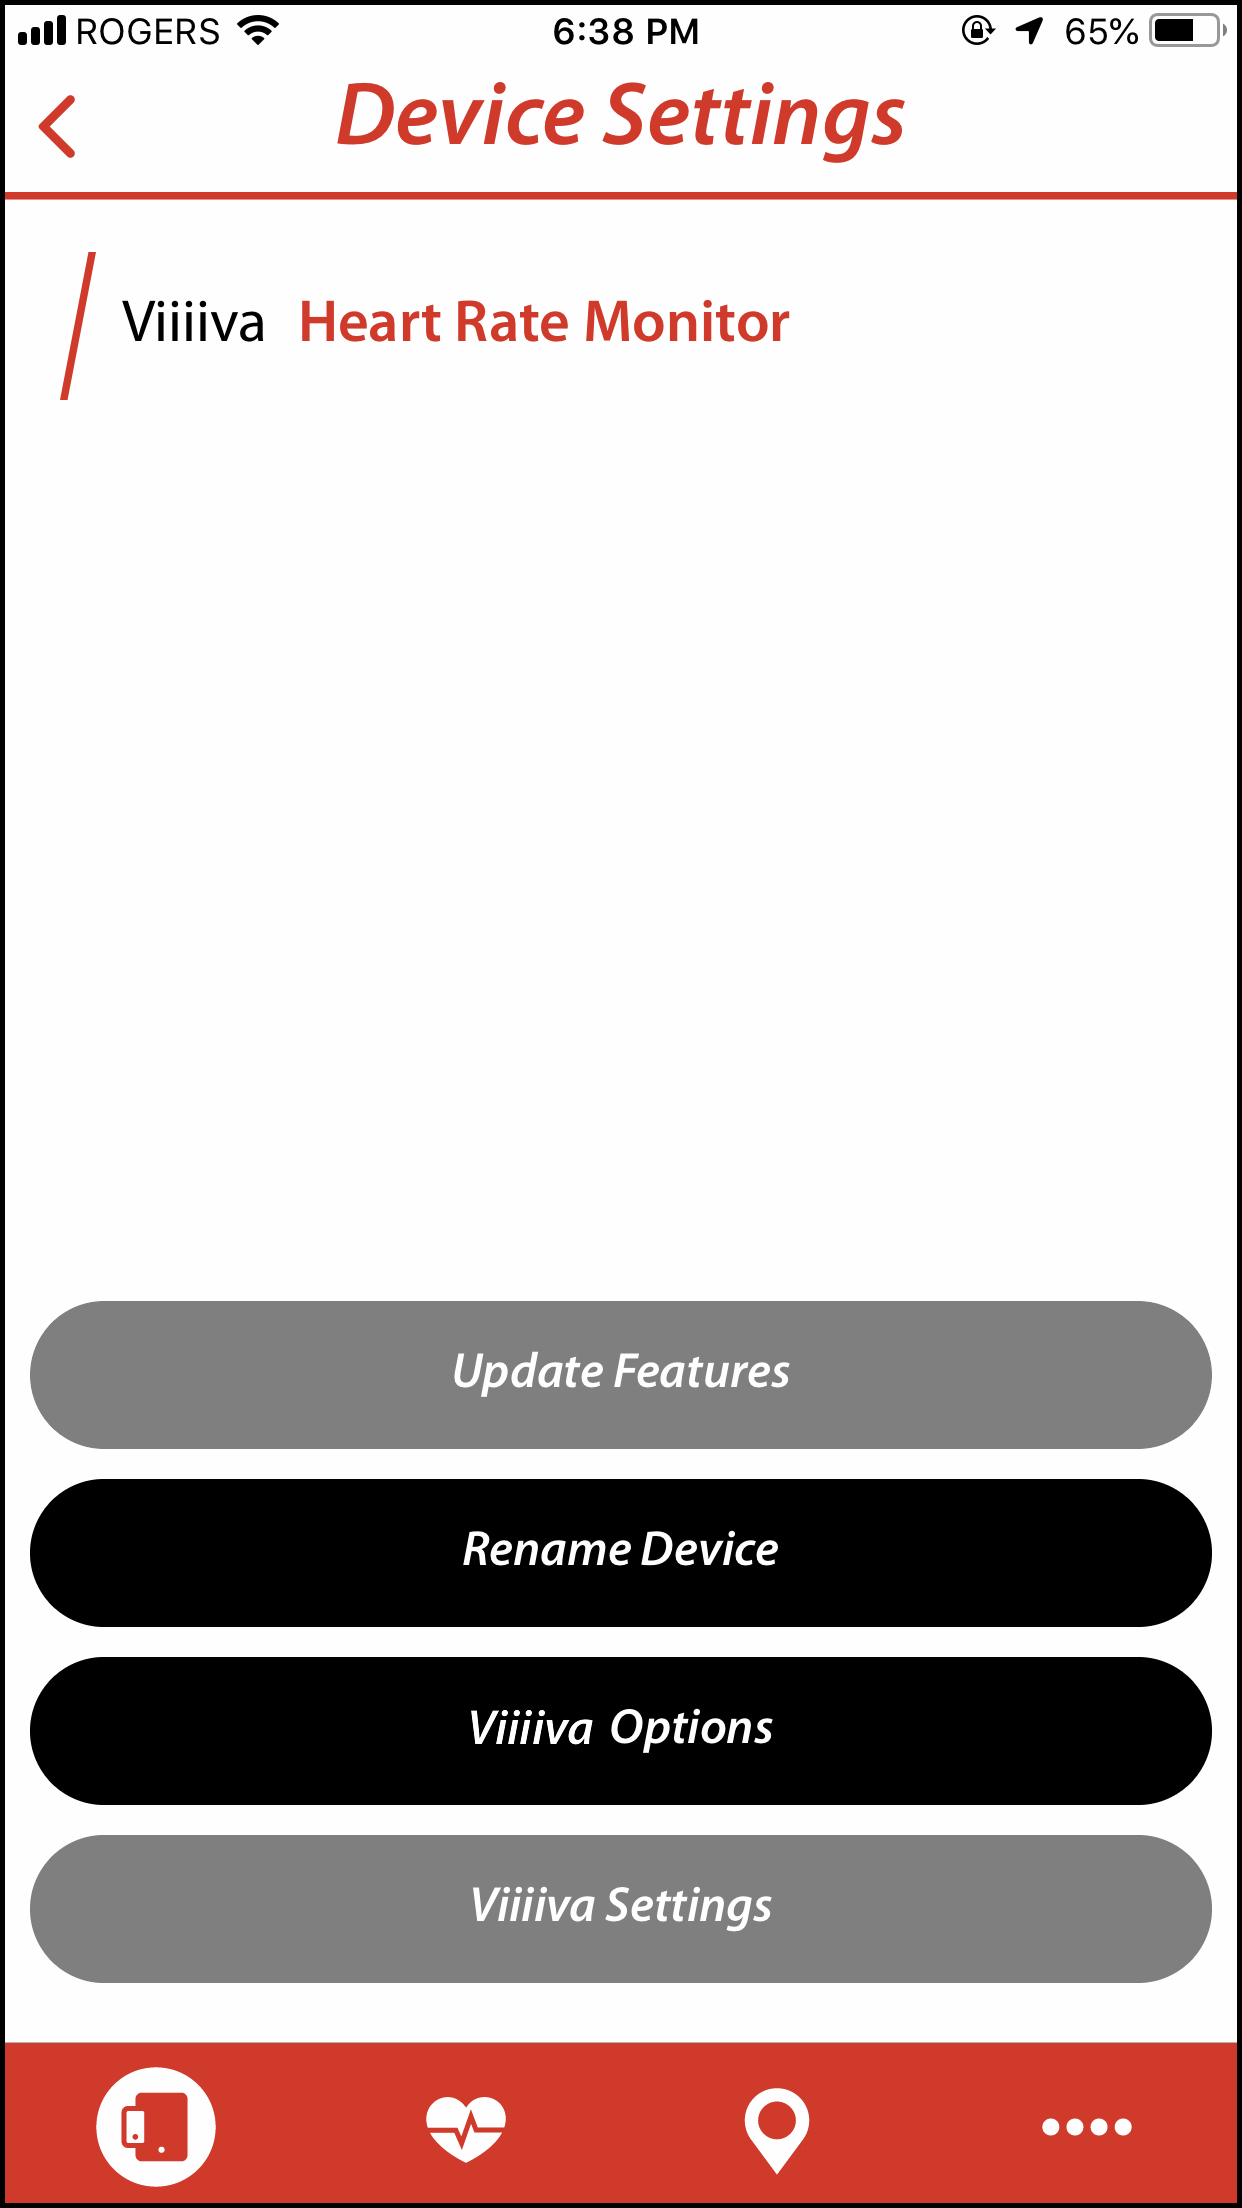
- After connecting to your Viiiiva, click on the Heart Rate Monitor field. This will open up the Device Settings screen.

- Click on the Viiiiva Options button. Click on the Download Workout Files button and the workouts will be downloaded to the phone.
Tiiiip: There will be a red number indicating the number of saved workouts that are saved on your Viiiiva.
SECTION 6.0
WORKOUTS
6.1
How to Record a Workout
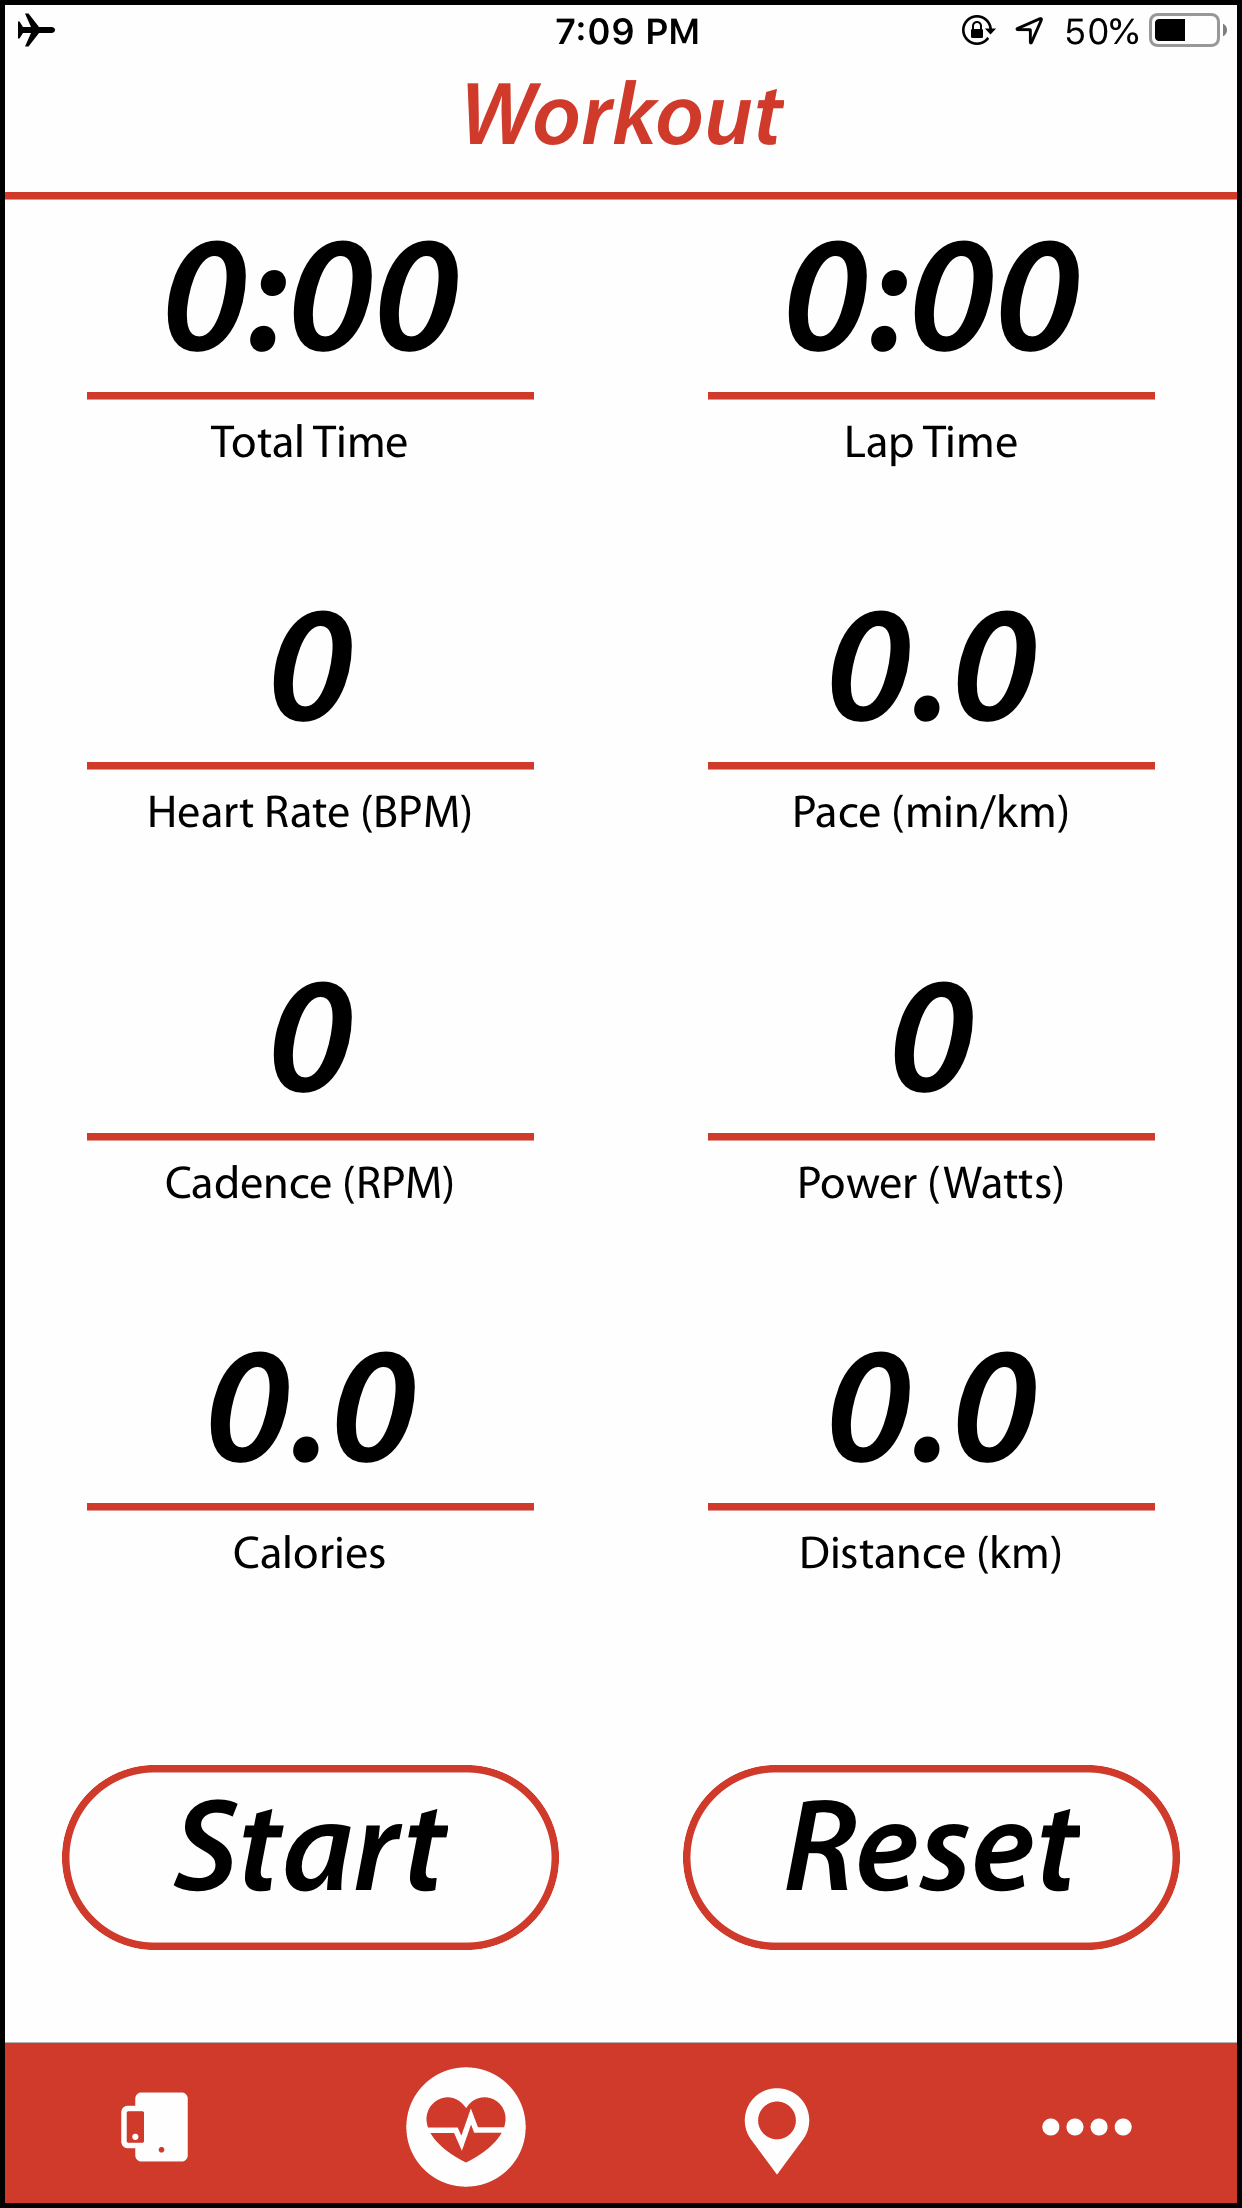
- Once your devices are connected to the 4iiii Sport App, navigate to the Workout tab on the bottom of the screen.
- Hit the Start icon to begin a workout.
- Once a workout has started, you can choose to either Reset or Lap your workout.
- Once finished, workouts will be saved in the Fit Files in the More screen.
6.2
Sending Saved Files
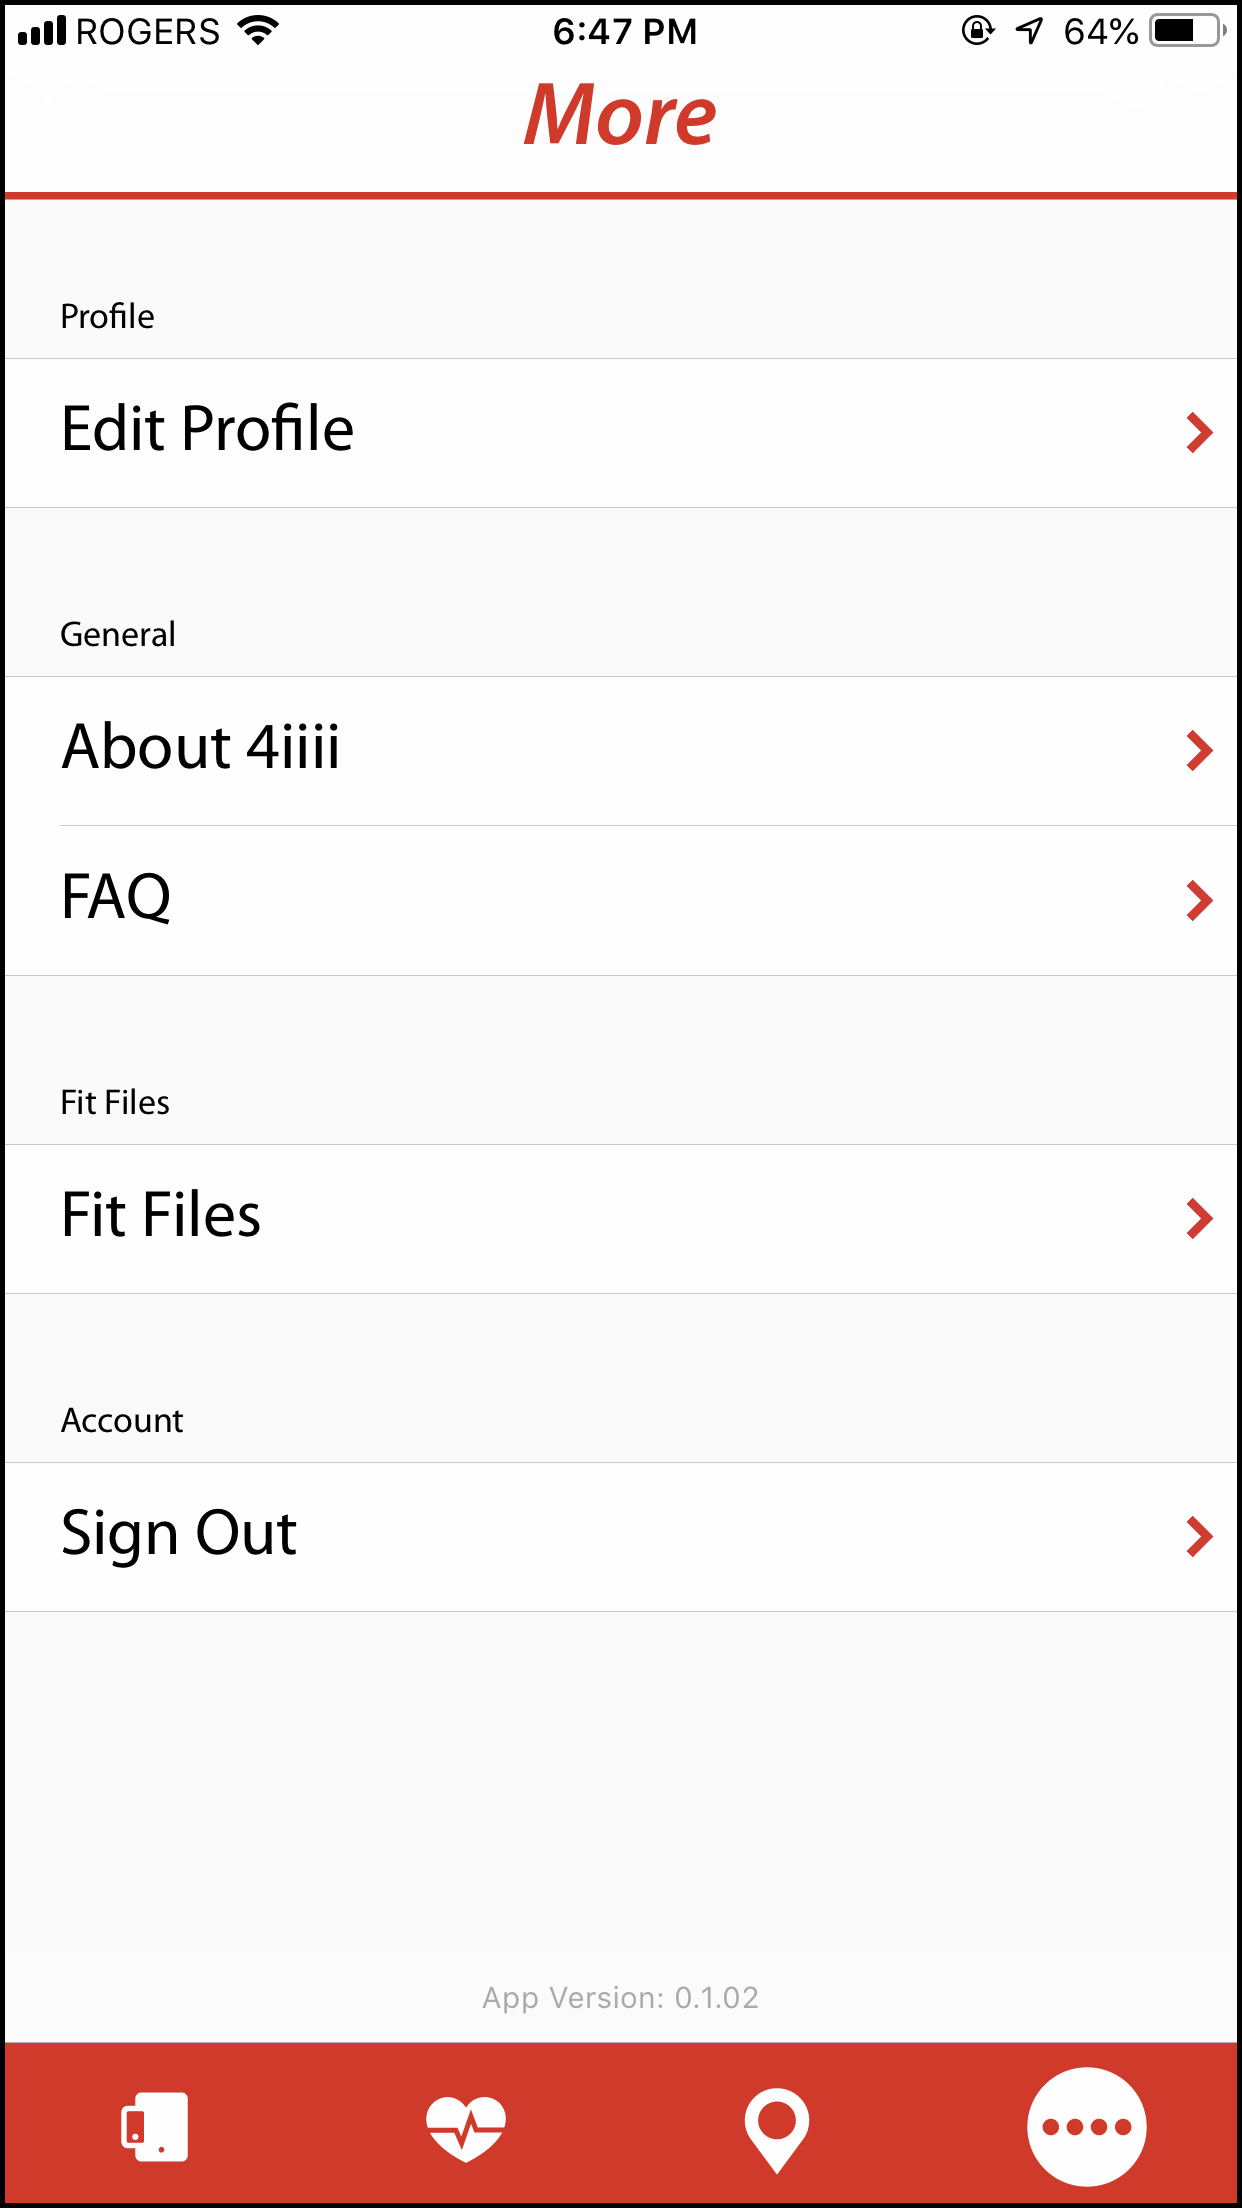
- Once files have been downloaded from your Viiiiva, click on the More icon.
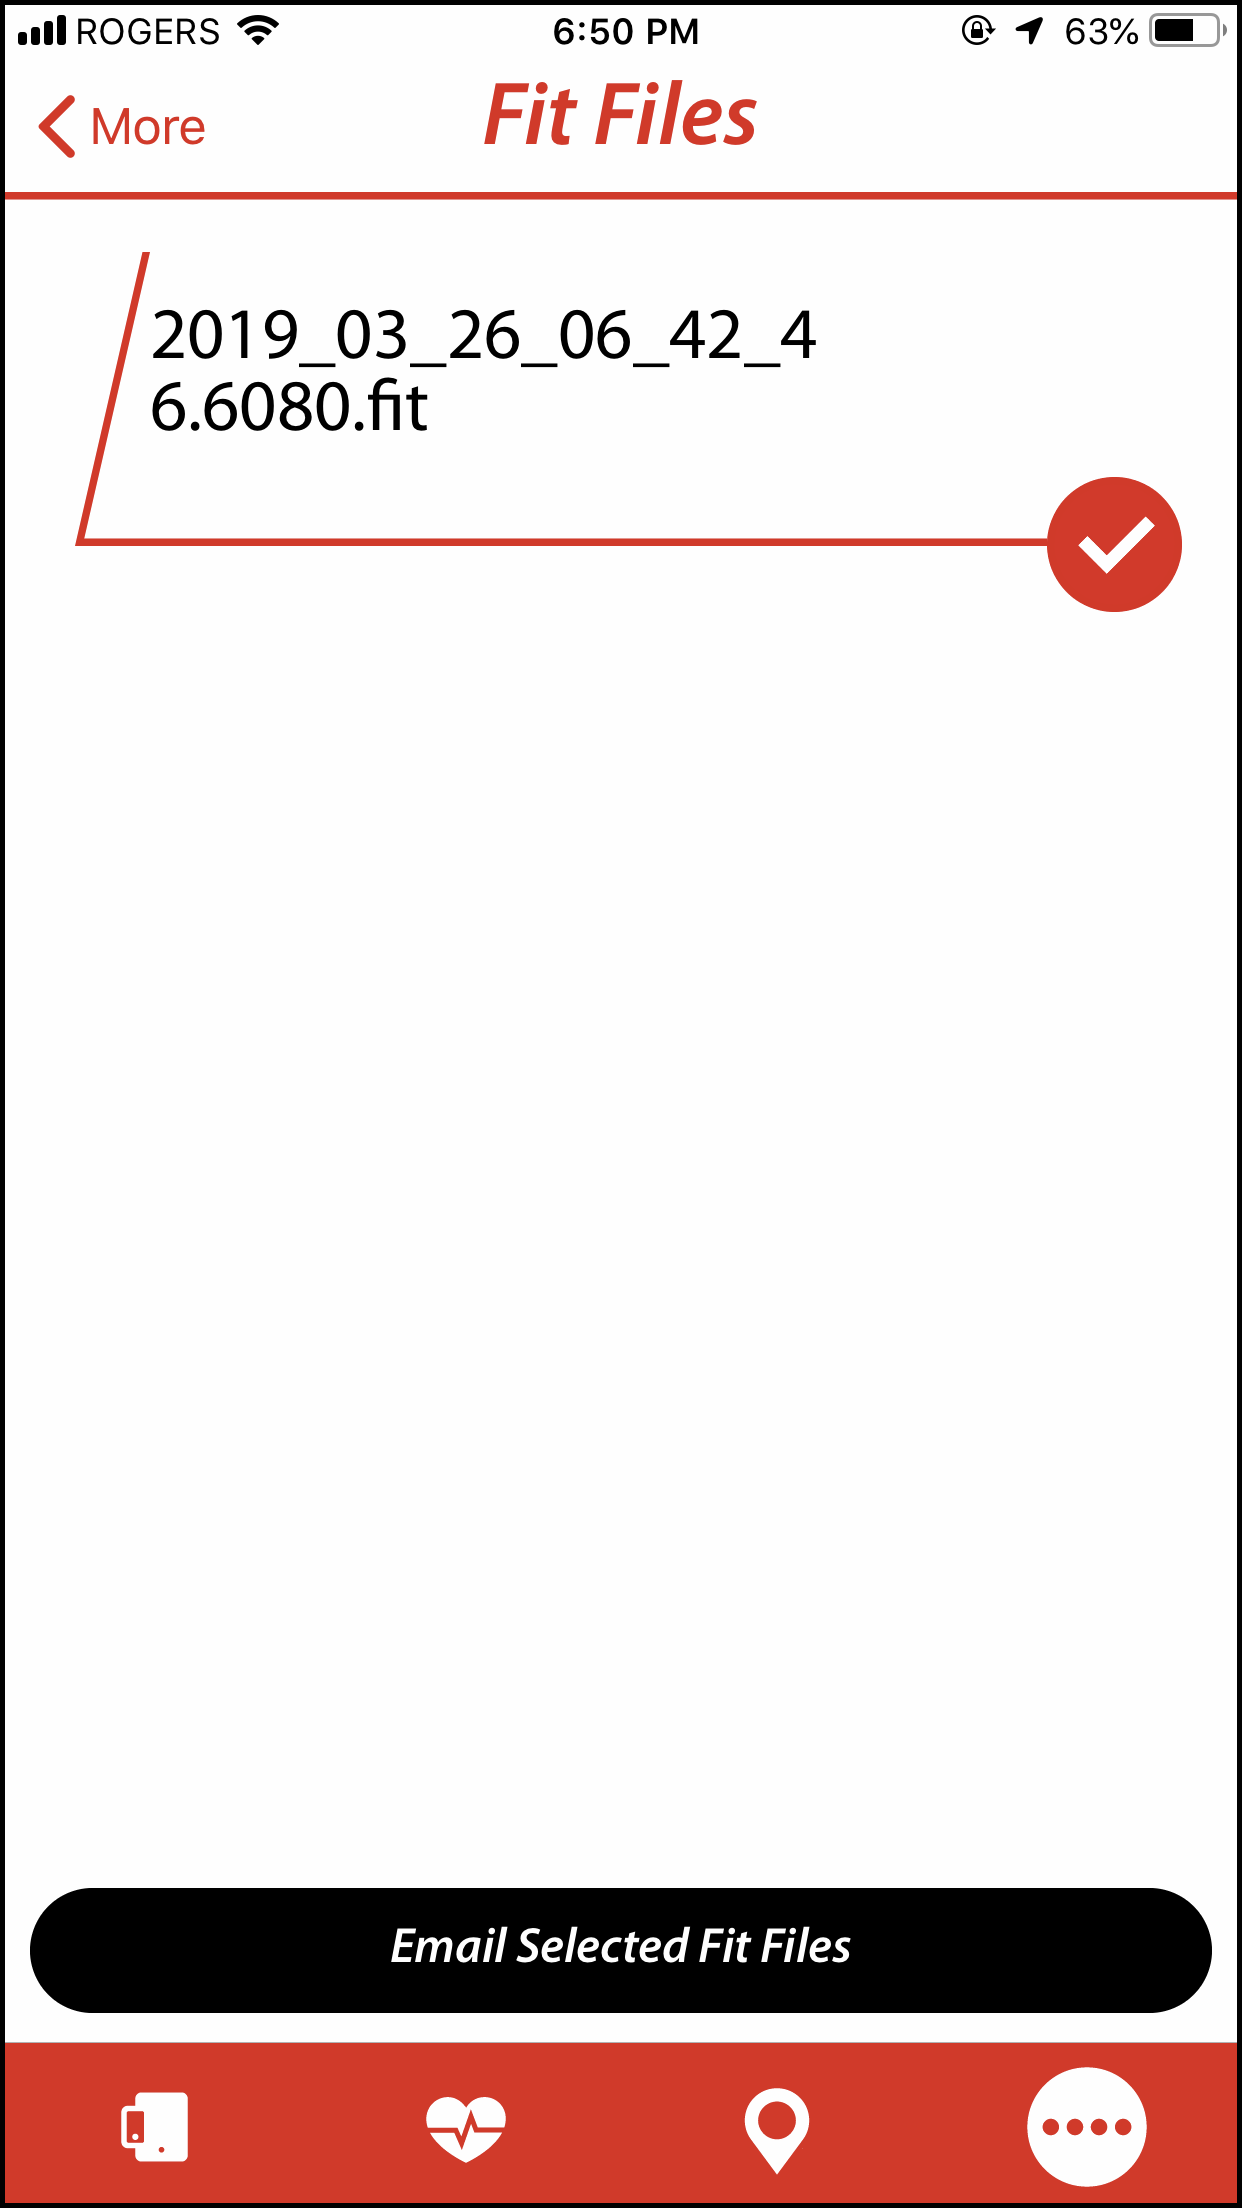
- Click on Fit Files. You will now see a list of files available for download. Simply click a workout and tap Email Selected Files. You will then be prompted with your email account connected to your iPhone.

- To delete a file, slide to the left to reveal a Delete button.
